Post a Free Blog

Submit A Press Release

At CWEB, we are always looking to expand our network of strategic investors and partners. If you're interested in exploring investment opportunities or discussing potential partnerships and serious inquiries. Contact: jacque@cweb.com

Generic selectors
Exact matches only
Search in title
Search in content
Post Type Selectors
Filter by Categories
Action
Animation
Anime
ATP Tour (ATP)
Auto Racing
Baseball
Basketball
Boxing
Breaking News
Business
Business
Business Newsletter
Call of Duty (CALLOFDUTY)
Canadian Football League (CFL)
Car
Celebrity
Champions Tour (CHAMP)
Comedy
CONCACAF
Counter Strike Global Offensive (CSGO)
Crime
Dark Comedy
Defense of the Ancients (DOTA)
Documentary and Foreign
Drama
eSports
European Tour (EPGA)
Fashion
FIFA
FIFA Women’s World Cup (WWC)
FIFA World Cup (FIFA)
Fighting
Football
Formula 1 (F1)
Fortnite
Golf
Health
Hockey
Horror
IndyCar Series (INDY)
International Friendly (FRIENDLY)
Kids & Family
League of Legends (LOL)
LPGA
Madden
Major League Baseball (MLB)
Mixed Martial Arts (MMA)
MLS
Movie and Music
Movie Trailers
Music
Mystery
NASCAR Cup Series (NAS)
National Basketball Association (NBA)
National Football League (NFL)
National Hockey League (NHL)
National Women's Soccer (NWSL)
NBA Development League (NBAGL)
NBA2K
NCAA Baseball (NCAABBL)
NCAA Basketball (NCAAB)
NCAA Football (NCAAF)
NCAA Hockey (NCAAH)
Olympic Mens (OLYHKYM)
Other
Other Sports
Overwatch
PGA
Politics
Premier League (PREM)
Romance
Sci-Fi
Science
Soccer
Sports
Sports
Technology
Tennis
Thriller
Truck Series (TRUCK)
True Crime
Ultimate Fighting Championship (UFC)
US
Valorant
Western
Women’s National Basketball Association (WNBA)
Women’s NCAA Basketball (WNCAAB)
World
World Cup Qualifier (WORLDCUP)
WTA Tour (WTA)
Xfinity (XFT)
XFL
0
Home Blog Page 74

Sesame Chicken

0
Photo Credit:- Cosori Air Fryers
We love Chinese food, but we obviously can’t order takeout every time the craving hits. With the Instant Pot ®, we’ve discovered just how easy it is to make some of our restaurant favorites at home. With a sweet glaze that has a little kick, this sesame chicken is even better than takeout!

INGREDIENTS

  • 2  tbsp  cornstarch  divided
  • 1/4  tsp  fine sea salt
  • 1  lb  chicken tenders  cut into  1 inch  pieces
  • 2  tbsp  toasted sesame oil  divided
  • 1/4  cup  soy sauce
  • 2  tbsp  ketchup
  • 1/4  tsp  red pepper flakes  optional
  • 1/4  cup  honey
  • 2  tbsp  Water
  • 2  tsp  sesame seeds

INSTRUCTIONS

BROWN THE CHICKEN.
  1. In a small bowl, combine  1 tablespoon  of cornstarch with the salt. Toss the chicken pieces in the cornstarch mixture until it is coated evenly. Select  Sauté  on the Instant Pot and adjust the heat to Medium. Add 1 tablespoon of sesame oil. When the oil is hot, add the chicken and cook for about  4 minutes, turning occasionally, or until golden brown.
PREPARE THE SAUCE.
  1. In another small bowl, combine the soy sauce, ketchup, and red pepper flakes (if using) and stir until well combined. Pour this sauce over the chicken.
PRESSURE COOK.
  1. Lock the lid into place and turn the valve to “sealing.” Select  Manual or Pressure Cook  and adjust the pressure to  High. Set the time for 3 minutes. When cooking ends, carefully turn the valve to “venting” to quick release the pressure.
FINISH THE SAUCE.
  1. Unlock and remove the lid. Add the remaining  1 tablespoon  of sesame oil and the honey and stir quickly to combine. Select  Sauté  on the Instant Pot and adjust the heat to Low. In a clean small bowl, whisk the remaining  1 tablespoon  of cornstarch into the water until it is smooth. Stir this slurry into the chicken, stirring constantly for  2 minutes, or until sauce reaches the desired consistency.
FINISH THE RECIPE.
  1. Sprinkle with the sesame seeds.

Source:- Cosorithis
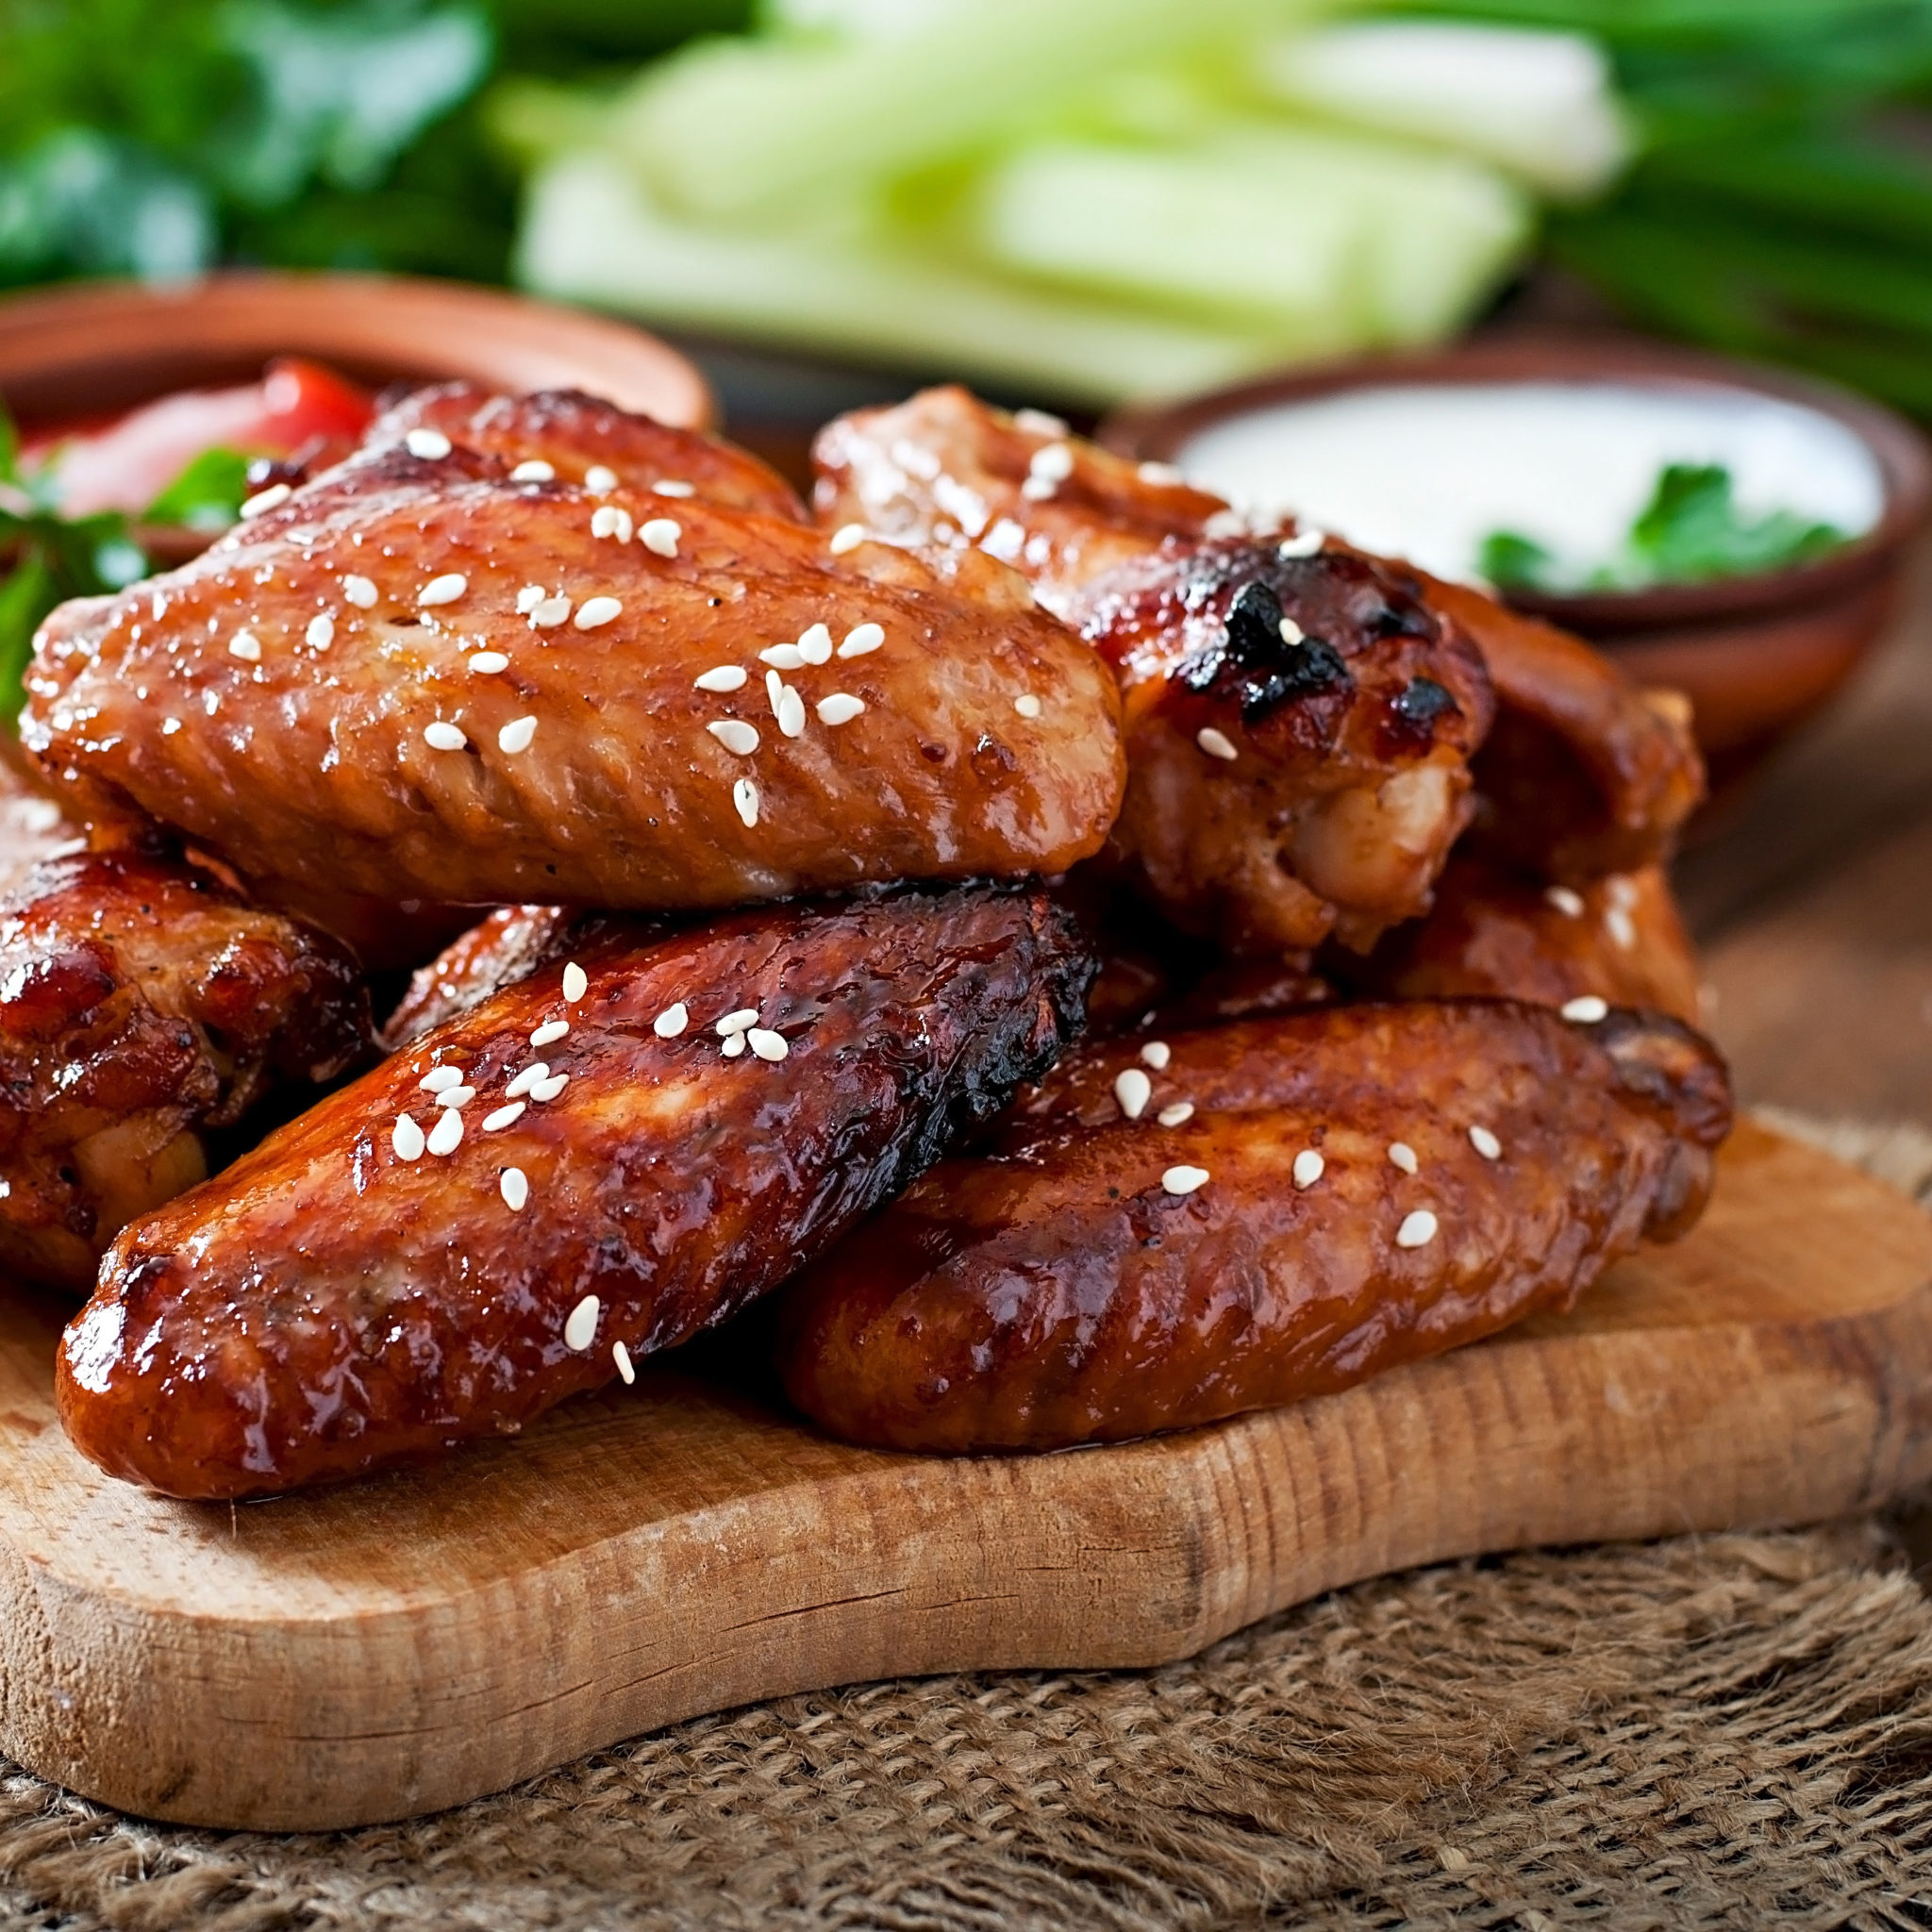
Glazed Teriyaki Wings

0
Photo Credit:- Cosori Air Fryers

INGREDIENTS

Sauce Mixture:
  • 1/2  cup  soy sauce
  • 1/3  cup  sugar
  • 2  tbsp  rice vinegar
  • 2  tbsp  garlic  minced
  • 2  tbsp  Ginger  grated
  • 1  tsp  toasted sesame oil
  • 1/2  tsp  pepper
  • 1/2  tsp  Sriracha sauce  or to taste
  • 1  cinnamon stick
Glazed Teriyaki Wings
  • 2 – 2 1/2  lbs  chicken wingettes
  • 2  tbsp  cornstarch
  • 1  tbsp  Water
  • Sesame seeds and sliced green onions  for garnish

INSTRUCTIONS

  1. Combine Sauce Mixture ingredients in the Instant Pot and stir to combine.
  2. Add chicken wingettes and toss to coat, then secure the lid, making sure the vent is closed.
  3. Using the display panel select the  MANUAL or PRESSURE COOK  function*. Use the +/- keys and program the Instant Pot for  5 minutes.
  4. When the time is up, let the pressure  naturally release  for  15 minutes, then quick-release the remaining pressure.
  5. Carefully remove the wings from the pot to a foil-lined baking sheet coated with nonstick spray and set aside.
  6. Turn the pot off by selecting  CANCEL, then using the display panel select the SAUTE function.
  7. In a small bowl, mix together  1/4 cup  cooking liquid with cornstarch. Stir into the pot.
  8. Continue to cook and stir until sauce is thickened and reduced,  3-5 minutes.
  9.  Baste the chicken wings with the sauce and set under the broiler until caramelized,  7-12 minutes.
  10. Serve wings garnished with sesame seeds and sliced green onions, with remaining sauce for dipping on the side.

RECIPE NOTES

*The MANUAL and PRESSURE COOK buttons are interchangeable.

Source:- Cosorithis

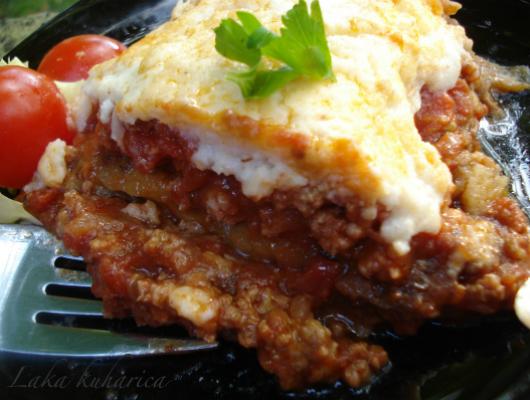
Classic Greek Moussaka

0

A succulent casserole with eggplants, minced meat and cheese. You can freeze moussaka either cooked or uncooked.

Ingredients

2-4 egg plants, thinly sliced
Sea salt
Olive oil
50g homemade bread crumbs
230g feta cheese, grated
Meat Sauce:
1 tbs olive oil
2 onions, finely chopped
400 g lean minced beef
480g chopped tomatoes from a can
4 cloves garlic, finely chopped
¼ tsp ground cinnamon
¼ tsp ground allspice
Salt and ground white pepper
2 tbs tomato paste
Béchamel Sauce:
50 g butter
50 g flour
250 ml warm milk
Salt and ground white pepper
½ tsp ground nutmeg
3 egg yolks

Preparation

1. Sprinkle the egg plant slices with salt and let them stand for 45 minutes. Then wash thoroughly to remove excess salt.
2. Thinly brush each slice with olive oil and bake in the preheated grill pan for several minutes on each side. Set aside. Repeat until all slices are grilled.
3. For the meat sauce lightly saute the onions in olive oil until tender.
4. Add ground beef and saute, stirring frequently to break up the clumps of meat, until the meat is no longer pink.
5. Stir in tomatoes, garlic, cinnamon, allspice, salt and pepper and simmer briefly on low heat.
6. Add in tomato paste and a little water if the sauce is to thick. Remove from heat and set aside.
7. For the béchamel sauce add flour to the melted butter, stirring constantly. When the mixture is evenly thick, gradually whisk in warm milk. Gently bring to the boil, then remove from heat, season with pepper and nutmeg. Whisk in (vigorously) the egg yolks. Set aside.
8. Thinly coat with olive oil a suitable ovenproof baking dish, sprinkle the bottom with homemade bread crumbs.
9. Place a layer of egg plant, cover with some meat sauce and feta cheese and repeat this until the pan is almost full. Finish with a layer of feta cheese.
10. Top with béchamel sauce.
11. Cover with tin foil and bake in a preheated oven at 180ËšC for 1 hour.
12. Remove moussaka from the oven and let it set at room temperature 45 minutes before serving.
Credit: Foodista

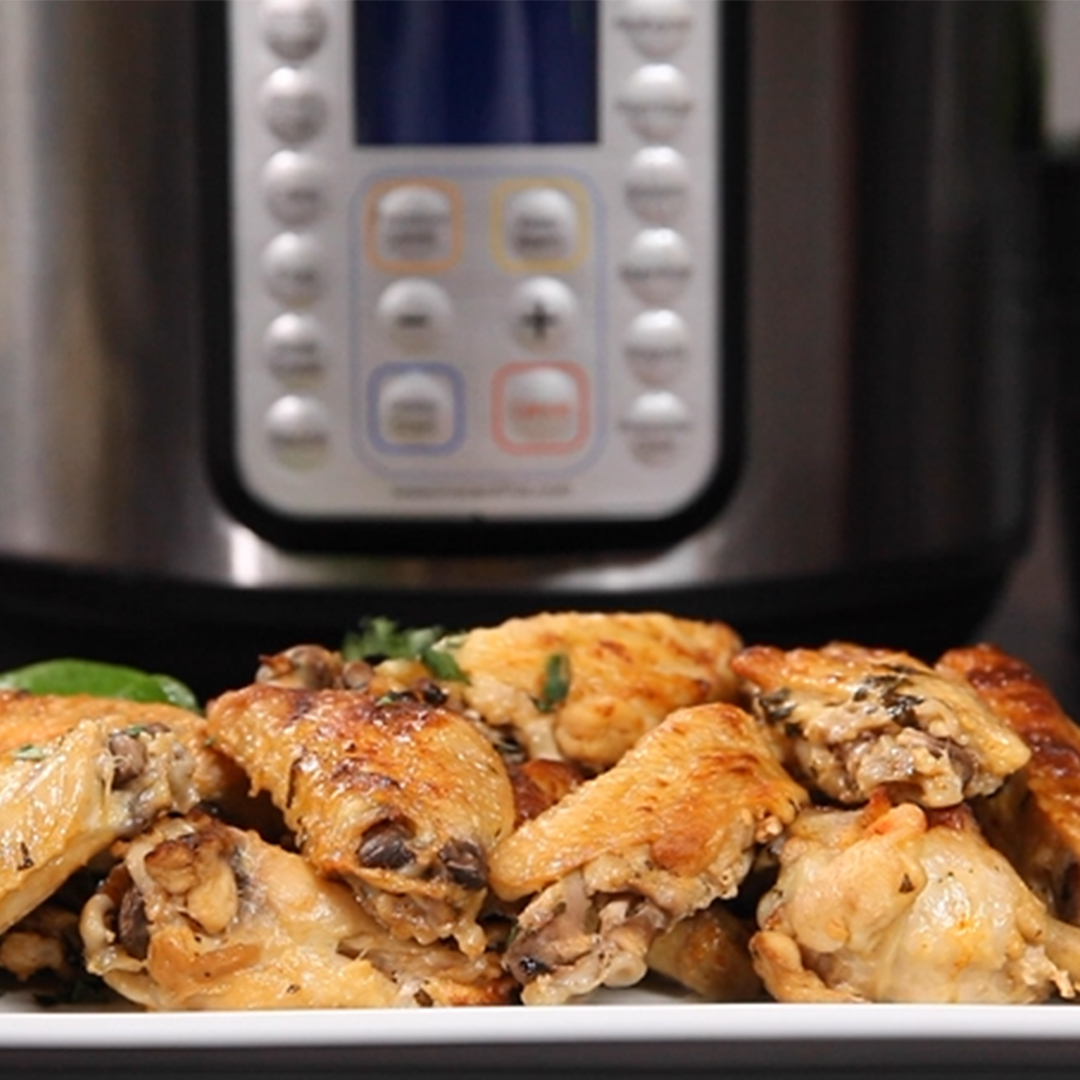
Cilantro Lime Wings

0
Photo Credit:- Cosori Air Fryers

INGREDIENTS

  • 1  tbsp  olive oil
  • 1 1/2 – 2  lbs  chicken wingettes
  • 4  cloves  minced Garlic
  • 1/3  cup  chicken broth
  • 3  tbsp  lime juice
  • 1/4  tsp  cayenne pepper
  • 1  tsp  salt
  • 2  tbsp  chopped cilantro
  • Additional chopped cilantro for garnish

INSTRUCTIONS

  1. Add olive oil to the Instant Pot. Using the display panel select the  SAUTE  function.
  2. When oil gets hot, brown the chicken on 2 sides,  3-4 minutes per side. Meat will not be cooked through. Do not crowd the pot–you may have to work in batches.
  3. Add garlic and cook for  1-2 minutes  more.
  4. Return all chicken to the pot. Add broth and lime juice to the pot and deglaze by using a wooden spoon to scrape the brown bits from the bottom of the pot.
  5. Sprinkle cayenne, salt and cilantro over the top. Do not stir.
  6. Turn the pot off by selecting  CANCEL, then secure the lid, making sure the vent is closed.
  7. Using the display panel select the  MANUAL or PRESSURE COOK  function*. Use the +/- keys and program the Instant Pot for  5 minutes.
  8. When the time is up, let the pressure naturally release for 15 minutes, then quick-release the remaining pressure.
  9. Carefully remove the meat from the pot to a foil-lined baking sheet and set under a broiler until golden brown, about  5 minutes.
  10. Serve warm sprinkled with additional cilantro.

RECIPE NOTES

*The MANUAL and PRESSURE COOK buttons are interchangeable.

Source:- Cosorithis

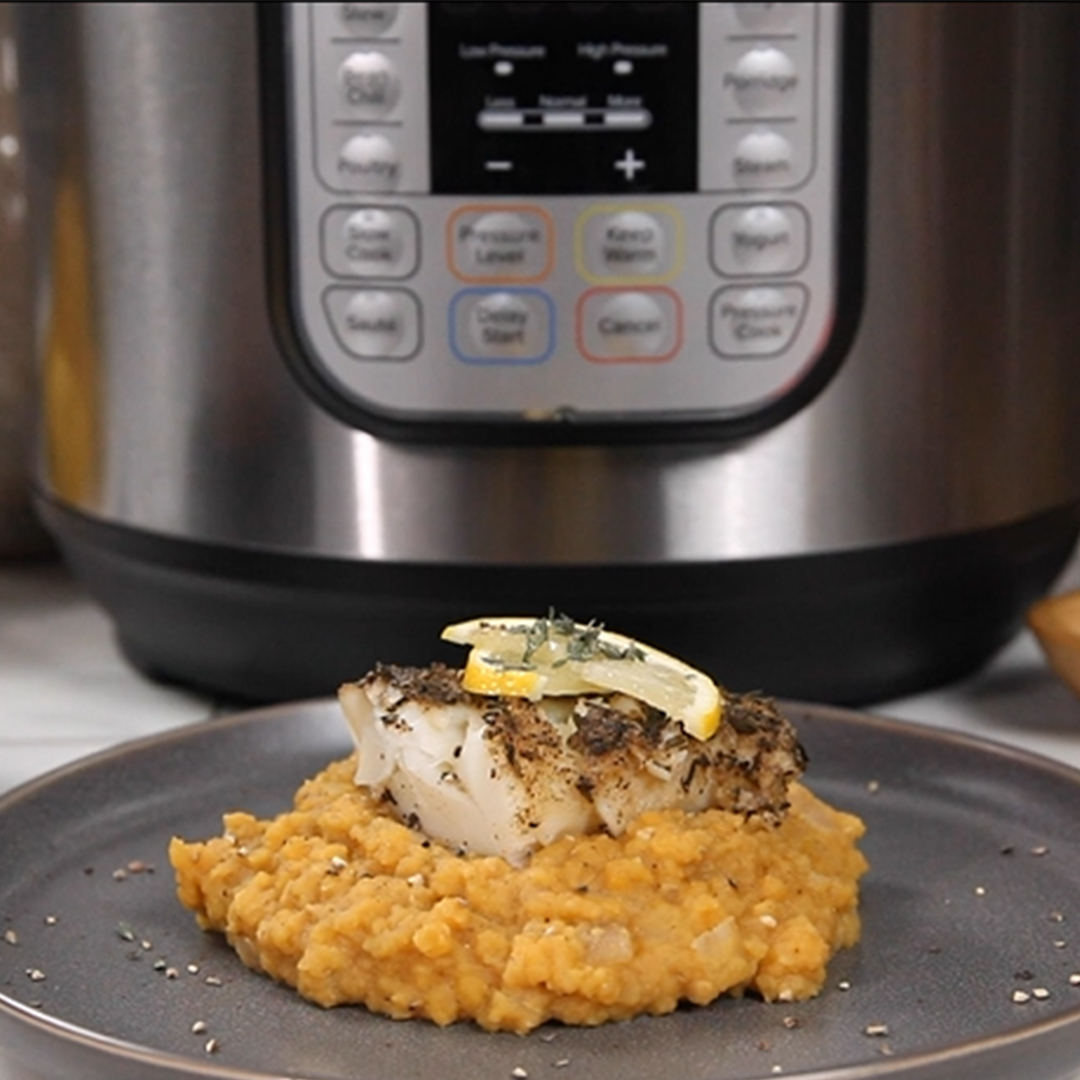
Spice-Rubbed Sea Bass and Red Lentils

0
Photo Credit:- Cosori Air Fryers

INGREDIENTS

Spice Mixture:
  • 1/2  tsp  ground coriander
  • 1/2  tsp  dried thyme leaves
  • 1/4  tsp  pepper
  • 1/4  tsp  kosher salt
Spice-Rubbed Sea Bass and Red Lentils
  • 4 6  oz  sea bass fillets  at least  1 inch  thick, skin removed
  • 2  tbsp  olive oil
  • 1  onion  finely diced
  • 1  clove  garlic  minced
  • 2  tsp  ground ginger
  • 1 1/2  tsp  ground cumin
  • 4  cups  chicken broth  or vegetable
  • 1  lb  red lentils
  • 3  tbsp  lemon juice
  • 3/4  tsp  salt
  • 1/4  tsp  pepper

INSTRUCTIONS

  1. In a small bowl, combine Spice Mixture ingredients.
  2. Place fish in one even layer in a steamer basket and sprinkle with spice mixture. Set aside.
  3. Add olive oil to the Instant Pot. Using the display panel select the  SAUTE  function.
  4. When oil gets hot, add onion to the pot and saute until soft,  3-4 minutes.  Add garlic, ginger and cumin and cook for 1-2 minutes more.
  5. Add broth to the pot and deglaze by using a wooden spoon to scrape the brown bits from the bottom of the pot.
  6. Add lentils to the pot and stir to combine.
  7. Insert a steam rack or riser, and carefully lower the steamer basket onto the riser.
  8. Turn the pot off by selecting  CANCEL,  then secure the lid, making sure the vent is closed.
  9. Using the display panel select the  MANUAL or PRESSURE COOK  function*. Use the +/- keys and program the Instant Pot for  5 minutes.
  10. When the time is up, quick-release the pressure. Check the fish for doneness. If it is not quite cooked through close the lid and leave on  KEEP WARM  for another  3-5 minutes.
  11. Carefully remove the steamer basket and riser from the pot. Add lemon juice,  3/4 tsp salt  and  1/4 tsp pepper  to the lentils and stir.
  12. Serve the fish on a bed of lentils.

RECIPE NOTES

*The MANUAL and PRESSURE COOK buttons are interchangeable.

Source:- Cosorithis

Classic Gazpacho with Spicy Grilled Shrimp

0

Classic Gazpacho with Spicy Grilled Shrimp – a perfectly healthy and delicious end-of-summer meal! Loaded with jalapenos, cucumbers, red peppers, shallots, tomatoes, olive oil and sherry vinegar. Low-carb, gluten-free, dairy-free, and Paleo friendly!

Ingredients

For The Shrimp:
11/2 pounds shrimp, cleaned and deveined
½ cup fresh lemon juice
3 garlic cloves, minced
2 tablespoons olive oil
½ teaspoon cayenne pepper
2 teaspoons paprika
1 teaspoon smoked paprika
½ teaspoon salt
For The Gazpacho:
31/2 pounds ripe tomatoes (I used heirloom since they’re juicier)
2 red peppers, seeds, veins and stem removed
2 large shallots, skin removed and root cut off
2 large garlic cloves, minced
2 tablespoons olive oil
1 large English cucumber, skin and seeds removed
3 jalapeños, seeds, veins and stem removed (1 for garnish)
¼ cup sherry vinegar
11/2 teaspoons salt
½ teaspoon pepper
1-2 avocados for garnish
â…“ cup Parsley or cilantro for garnish
3 green onions for garnish

Preparation

1. For The Shrimp:
2. Put shrimp in a large resealable plastic bag.
3. Mix the remaining ingredients together and pour over shrimp.
4. Marinate 20 minutes in the refrigerator.
5. Heat grill to 450-500 degrees and grill for 2-3 minutes per side.
6. For The Gazpacho:
7. Wash, dry and remove the core of each tomato. Over a fine mesh colander with a large bowl underneath, use a spoon and scoop out the meat of the tomato, leaving the skin and flesh intact. Make sure all the juice, seeds and meat go into the colander. Set the hollowed out tomato aside.
8. Make sure the tomato seeds are removed from the meat, then put the tomato pieces into a food processor (or blender).
9. Using a spatula press, stir, and work to get all the juice through the colander, leaving the seeds behind. Discard the seeds and add the juice (should be about 11/2 cups) to the food processor.
10. Add half of one chopped red pepper, half of one chopped shallot, 2 minced garlic cloves, and 2 tablespoons of extra virgin olive oil to the food processor. Blend until completely smooth. Pour this liquid into a large bowl and set aside (should be 5 cups of liquid total).
11. Finely chop the rest of the shallots and red pepper, jalapeno, cucumber, and tomato skin with flesh. Add to the bowl of tomato liquid, then stir in sherry vinegar, salt and pepper. Place in the fridge and let chill at least 2 hours (longer would be better) before eating.
12. Meanwhile, finely chop the jalapeno, green onions, and parsley for garnish and refrigerate until soup is ready to serve. Slice and dice the avocado for garnish right before serving.
13. Recipe Notes: You can also sauté the shrimp on the stove for 2-3 minutes per side if preferred.
Credit: Foodista

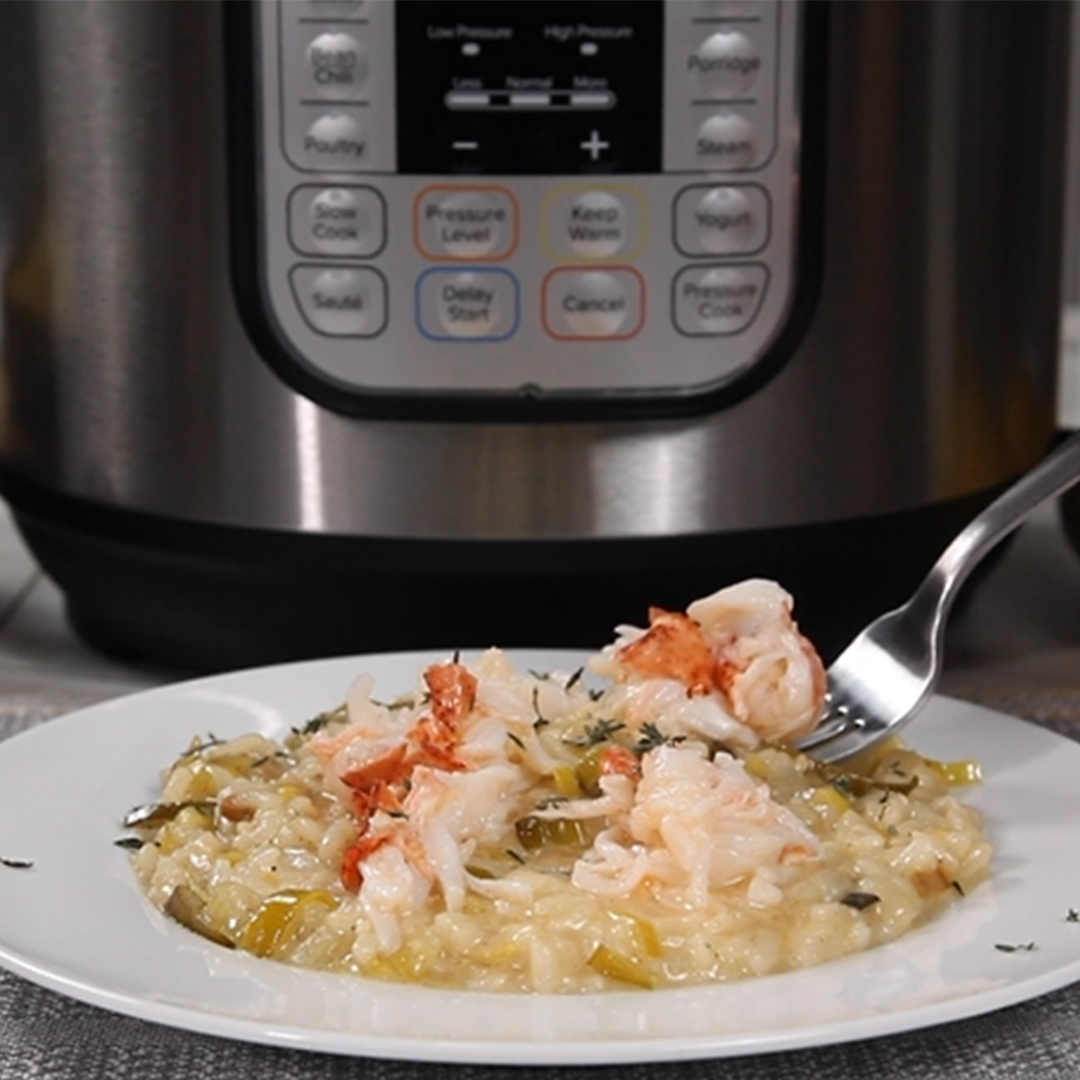
Champagne Lobster Risotto

0
Photo Credit:- Cosori Air Fryers

INGREDIENTS

  • 1/2  cup  Water
  • 1/2  cup  champagne
  • 8  ounces  lobster tail meat  about  2 lobster tails
  • 2  tbsp  butter  +  2 tsp
  • 1  tbsp  extra-virgin olive oil
  • 1  large shallot  peeled and minced
  • 1  leek  sliced and rinsed well
  • 2  cloves  garlic  minced
  • 1  cup  Arborio rice  be sure to get arborio rice
  • 2/3  cup  champagne
  • 2  cups  fish  or seafood stock
  • 3  tbsp  Mascarpone cheese
  • 1  tsp  kosher salt
  • 1/2  tsp  white pepper
  • 1  tsp  lemon juice
  • leaves  fresh thymefor garnish

INSTRUCTIONS

  1. Pour  1/2 cup  water and  1/2 cup  champagne into the Instant Pot and insert the steam rack.
  2. Place the lobster tails on the steam rack, then secure the lid, making sure the vent is closed.
  3. Using the display panel select the  MANUAL or PRESSURE COOOK  function*. Use the +/- keys and program the Instant Pot for  4 minutes.
  4. When the time is up, quick-release the pressure, then remove the lobster tails to a shallow dish and cover with foil. Remove the rack and discard the water
  5. Add 1 tbsp olive oil and  2 tbsp  butter to the Instant Pot. Using the display panel select the  SAUTE  function.
  6. When oil gets hot and butter has melted, add shallots and leeks to the pot and saute until soft,  2-3 minutes. Add garlic and cook for  1-2 minutes  more. Add rice and cook for 2-3 minutes more.
  7. Add champagne and stock to the pot and deglaze by using a wooden spoon to scrape any brown bits from the bottom of the pot.
  8. Turn the pot off by selecting  CANCEL,  then secure the lid, making sure the vent is closed.
  9. Using the display panel select the  MANUAL or PRESSURE COOOK  function*. Use the +/- keys and program the Instant Pot for  10 minutes.
  10. Meanwhile, melt remaining  2 tsp  butter in a small bowl. Crack open lobster shells, pry out the meat and roughly chop. Toss lobster meat with melted butter and  1 tsp  lemon juice.
  11. When cooking time is up, quick-release the pressure.
  12. Add mascarpone, salt and while pepper. Stir until desired consistency is reached.
  13. Serve risotto topped with lobster. Sprinkle with fresh thyme.

RECIPE NOTES

*The MANUAL and PRESSURE COOK buttons are interchangeable.

Source:- Cosorithis

Chicken Bordon Bleu

0
Photo Credit:- Cosori Air Fryers

INGREDIENTS

For the Chicken
  • 2  boneless, skinless chicken breasts
  • 1  avocado  sliced thin
  • 4  slices of prosciutto  cut in half (can substitute with deli ham)
  • 8-12  slice  slices of Gruyere cheese (may substitute with Swiss cheese  eachneeds to be about the size and shape of a domino)
  • Salt and pepper
For the Lemon Dijon Cream Sauce
  • 3  tablespoons  butter
  • 3  tablespoons  flour  I used white whole wheat
  • 2  cups  milk  preferably 2% but skim milk works okay
  • 1/3  cup  Parmesan cheese
  • 3  tablespoons  Dijon mustard
  • 1/2  teaspoon  garlic powder
  • Juice of 1 lemon
  • pinch  smallof red pepper flakes
  • salt and pepper to taste
For the Onion Panko Crumble
  • 2  tablespoons  butter
  • 1 1/2  cups  French fried onions
  • 1  cup  panko  I used whole wheat panko
  • pinch  of kosher salt
For the Burst Tomatoes
  • 2  cups  grape tomatoes
  • salt
  • pepper
  • Italian seasoning

INSTRUCTIONS

  1. Weigh each chicken breast individually to find out how many ounces it weighs. This will determine your cook time later and is important for moist chicken (my favorite Rich Lum tip, Thanks Rich!).
  2. Cut slits into the chicken breasts, about  1/2 inch  apart, being very careful not to cut all the way through the chicken. You want the bottom of the chicken breast to stay intact so the top can fan open without it falling apart. Season with salt and pepper.
  3. Working with 1 chicken breast at a time, fill the slits with 1/2 of an avocado. Wrap each slice of prosciutto (or ham) around a slice or 2 of cheese; this will keep the cheese from melting out of the chicken. Fill slits in the chicken with the prosciutto wrapped cheese. Repeat with second chicken breast.
  4. Place stuffed chicken on a sturdy trivet or a pan with holes in the bottom. If you don’t have either, simply use what trivet you have, place a piece of tinfoil on top of it to make it more stable, and poke holes into it with a knife or fork so that the extra juices of the chicken can drain while cooking.
  5. For the Burst Tomatoes: place tomatoes in a pan and sprinkle with salt, pepper, and Italian seasoning.
  6. Pour  1 cup  of water into the pressure cooker pot and place the trivet with chicken inside. Top with a second trivet and place tomatoes on top.
  7. Note: you don’t want the pan of tomatoes sitting directly on top of the chicken so use a trivet with longer legs. If you don’t own a taller trivet for this step, just roast the tomatoes under the oven broiler for a few minutes while the chicken cooks.
  8. Secure the lid and turn pressure release knob to a sealed position. Cook at  high pressure  for 1 minute per ounce of each chicken breast (for example if each of your chicken breasts weigh about 8 ounces, you’ll cook for 8 minutes. If one weighs 8 ounces and the other 10 ounces, cook for 9 minutes).
  9. While the Chicken cooks, prepare the Lemon Dijon Cream Sauce. In a medium sauce pan, melt butter over medium heat. Add flour and whisk for 1 minute to cook out the flour taste. Gradually add milk, whisking constantly to prevent and remove any lumps. When smooth and thick, add parmesan cheese, Dijon mustard, garlic powder, lemon juice, red pepper flakes, and salt and pepper to taste and stir until cheese melts and everything is well incorporated. Keep sauce warm over low heat.
  10. Prepare the Onion Panko Crumble by melting butter in a medium skillet over medium heat. Add French Fried Onions, panko, and a pinch of salt and stir occasionally until it starts to brown, 2-3 minutes. Set aside to cool. This can be prepared up to 5 days in advance.
  11. When pressure cooking is complete, use a natural release.
  12. Optional but AMAZING: Place chicken under the broiler for 2-3 minutes to crisp the prosciutto and brown the cheese.
  13. To serve, place chicken breast on a plate with scoop of tomatoes, a big drizzle of Lemon Dijon Cream Sauce, and a sprinkle of Onion Panko Crumble.
Make Ahead Instructions
  1. Stuff the chicken breast with prosciutto and cheese (fill with avocado just before cooking). Store in the refrigerator in an air tight container for up to 2 days in advance.
  2. Onion Panko Crumble can be made up to 5 days in advance.

RECIPE NOTES

You can double or even triple this recipe depending on the size of your chicken breasts and pressure cooker pot. Omit the tomatoes (roast them in the oven instead) and instead stack more chicken breasts onto an upper trivet. Do not stack them on top of each other, there needs to be space between the chicken for all of them to cook evenly without drying out. If you want to skip the step of wrapping the cheese with the prosciutto, shred the cheese instead and once the chicken is cooked, sprinkle it with cheese and place it under the broiler to melt.

Source:- Cosorithis

Classic Beef Wellington Recipe

0

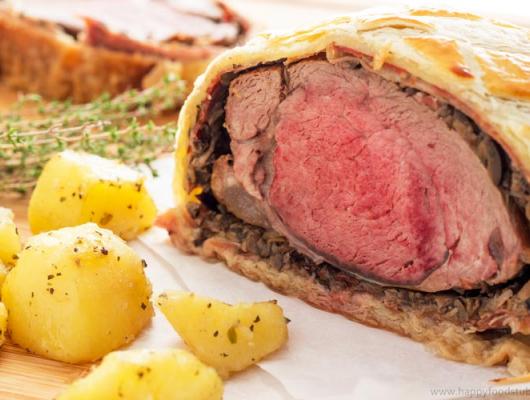
If you are looking for a fancy dinner idea, look no further! Beef Wellington is what you need to impress your dinner guests!

Ingredients

700 g (1.5 lb) Beef Tenderloin
275 g (10 oz) Puff Pastry
6 Slices Parma/Proscuitto/Jamon Ham
250 g (9 oz)Mushrooms
75 g (2.6 oz) Black Olives
1 Egg
Olive Oil
Fresh/Dried Thyme (2 fresh sprigs or 1 teaspoon dried)
Salt & Pepper to Taste

Preparation

1. Wash and finely slice mushrooms as well as olives.
2. Season the beef with salt and pepper. Heat up the oil in a frying pan (make sure the pan & oil are hot) before placing the beef in. Sear the meat from every side keeping the heat on high (this will take only 2-3 mins). Once the meat is seared, transfer it onto a plate.
3. Now throw in the mushrooms and olives. Add fresh thyme (without stems),season with salt & pepper and saute (add more olive oil if necessary) until all the water has evaporated from mushrooms (about 10 mins). Turn off the heat and let the mushroom mix cool down.
4. Place cling film on your table/work top and cover with 6 proscuitto/parma/jamon slices. Make sure the slices are overlapping each other. Now spread the mushrooms over creating an even layer.
5. Place meat in the center and carefully fold the parma ham with mushrooms over the meat/wrap the meat using cling film. Make sure it’s rolled tight. Now take the ends and twist them until the meat is sealed really tight and has a barrel shape look. Place it in the fridge for 30 minutes.
6. 30 minutes later: Take the meat out from the fridge. Remove the cling film. Place new sheet of cling film on your work top. Put puff pastry over the cling film and place the meat in the center. Roll the puff pastry over the meat. Trim off the excess pastry and seal it with egg wash. Seal both ends by pinching the pastry together with your fingers.
7. Now put the cling film over the pastry and again roll until it is tight (the tighter it is the better the final look).
8. Place in the fridge for at least 10 minutes (you can prepare it the night before).
9. Brush with egg wash and if you want to impress your diners then mark the pastry with some lines (of your choice) using back of your knife.
10. Bake in a preheated oven at 200 C/400 F for 40 minutes.
11. Take out and let it rest for 10 minutes before serving.
12. Serve with potatoes or potato mash and/or gravy!
13. Enjoy!
Credit: Foodista

Spaghetti Squash with Meat Sauce

0
Photo Credit:- Cosori Air Fryers
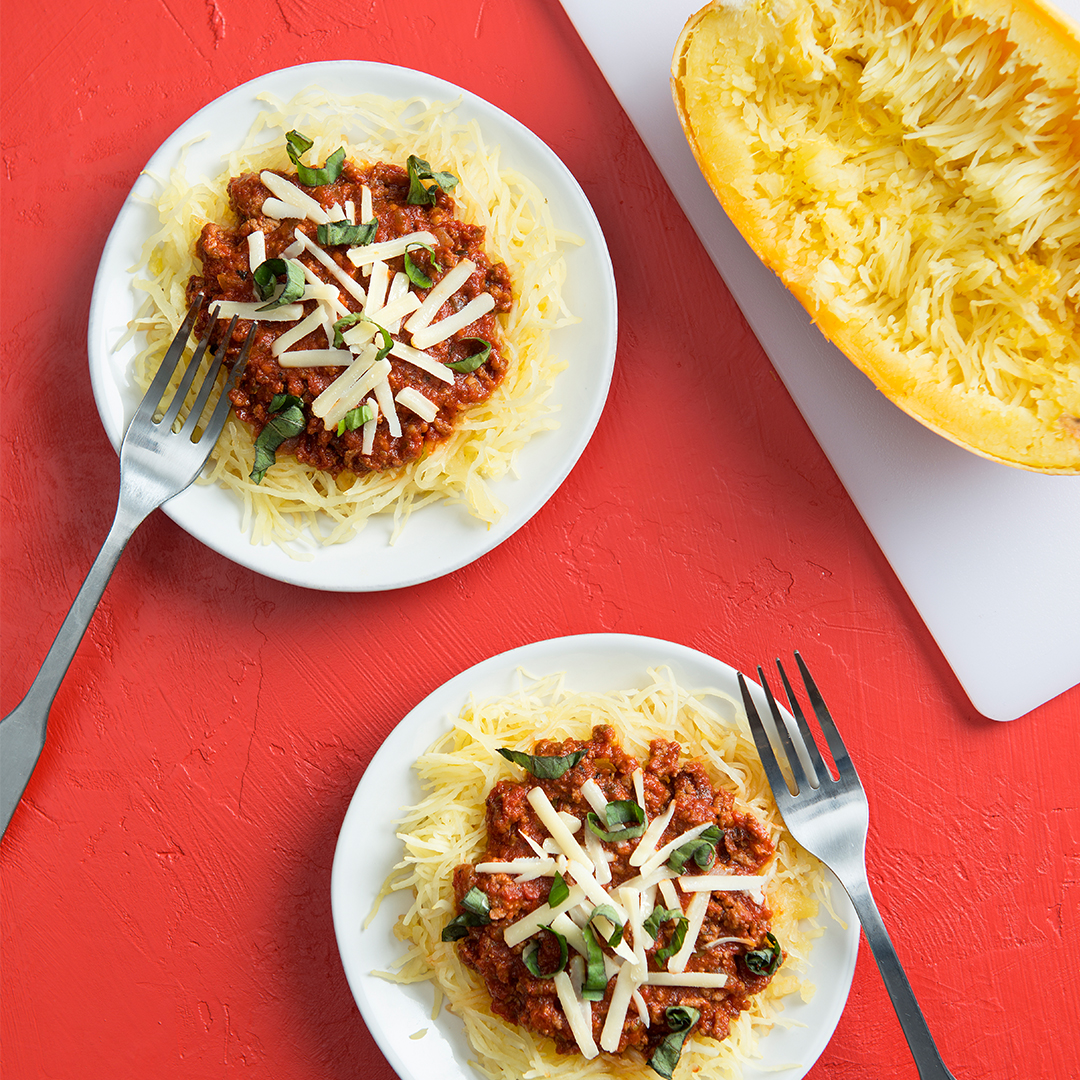
Spaghetti squash makes for a lovely pasta alternative in this hearty, keto-friendly version of an Italian classic. Spaghetti squash is low in carbs and so simple to roast whole in the Instant Pot.

INGREDIENTS

  • 1  tbsp  olive oil
  • 1  lb  ground beef
  • 2  cloves  garlic  minced
  • 1/4  cup  finely chopped yellow onion
  • 28  oz  can crushed tomatoes
  • 6  slices  uncured pepperoni or salami  chopped
  • 1 1/2  tbsp  Italian seasoning blend
  • 1  tsp  garlic powder
  • 1/2  tsp  dried parsley
  • 1/2  tsp  fine grind sea salt
  • 1/2  tsp  ground black pepper
  • 1/3  cup  beef broth
  • 1  bay leaf
  • 3  lb  spaghetti squash  washed and dried
  • 2  tbsp  tomato paste
  • 1 1/2  tbsp  grated parmesan cheese
  • 1  tbsp  fresh basil ribbons  optional

INSTRUCTIONS

  1. Select  Sauté (Normal). Once the pot is hot, add the olive oil, ground beef, garlic, and onions. Sauté, stirring continuously, for about 5 minutes or until the meat is browned.
  2. Add the crushed tomatoes, pepperoni or salami, Italian seasoning, garlic powder, parsley, sea salt, black pepper, and beef broth to the pot. Using a wooden spoon, stir and scrape the bottom of the pot to loosen any browned bits. Add the bay leaf.
  3. Using a paring knife, pierce the spaghetti squash 4 or 5 times on each side to create holes for venting the steam. Place the squash in the pot and on top of the sauce.
  4. Cover, lock the lid, and flip the steam release handle to the sealing position. Select  Manual or Pressure Cook (High)  and set the cook time for  8 minutes.  When the cook time is complete, allow the pressure to  release naturally  for  20 minutes  and then quick release the remaining pressure.
  5. Open the lid. Using a slotted spoon, carefully transfer the squash to a cutting board and set aside to cool.
  6. Add the tomato paste to the pot and stir. Select  Sauté (Less or Low), replace the lid, and let the sauce simmer for 6 minutes.
  7. While the sauce is simmering, slice the cooled squash in half and use a spoon to scoop out the seeds. Using a fork, scrape the flesh to create the noodles.
  8. Transfer the noodles to a colander to drain, pressing down on the noodles with paper towels to expel any excess moisture. Transfer the noodles to a serving platter.
  9. Remove and discard the bay leaf. Ladle the sauce over top of the noodles and garnish with the Parmesan and basil ribbons (if using). Serve warm.

RECIPE NOTES

Tip
Unused portions of the squash noodles and meat sauce can be stored separately in resealable containers in the
refrigerator for up to one week.

Nutrition per serving
Calories: 230
Fat: 12g
Net carbs: 9g
Protein: 19g

Source:- Cosorithis