Post a Free Blog

Submit A Press Release

At CWEB, we are always looking to expand our network of strategic investors and partners. If you're interested in exploring investment opportunities or discussing potential partnerships and serious inquiries. Contact: jacque@cweb.com

Generic selectors
Exact matches only
Search in title
Search in content
Post Type Selectors
Filter by Categories
Action
Animation
Anime
ATP Tour (ATP)
Auto Racing
Baseball
Basketball
Boxing
Breaking News
Business
Business
Business Newsletter
Call of Duty (CALLOFDUTY)
Canadian Football League (CFL)
Car
Celebrity
Champions Tour (CHAMP)
Comedy
CONCACAF
Counter Strike Global Offensive (CSGO)
Crime
Dark Comedy
Defense of the Ancients (DOTA)
Documentary and Foreign
Drama
eSports
European Tour (EPGA)
Fashion
FIFA
FIFA Women’s World Cup (WWC)
FIFA World Cup (FIFA)
Fighting
Football
Formula 1 (F1)
Fortnite
Golf
Health
Hockey
Horror
IndyCar Series (INDY)
International Friendly (FRIENDLY)
Kids & Family
League of Legends (LOL)
LPGA
Madden
Major League Baseball (MLB)
Mixed Martial Arts (MMA)
MLS
Movie and Music
Movie Trailers
Music
Mystery
NASCAR Cup Series (NAS)
National Basketball Association (NBA)
National Football League (NFL)
National Hockey League (NHL)
National Women's Soccer (NWSL)
NBA Development League (NBAGL)
NBA2K
NCAA Baseball (NCAABBL)
NCAA Basketball (NCAAB)
NCAA Football (NCAAF)
NCAA Hockey (NCAAH)
Olympic Mens (OLYHKYM)
Other
Other Sports
Overwatch
PGA
Politics
Premier League (PREM)
Romance
Sci-Fi
Science
Soccer
Sports
Sports
Technology
Tennis
Thriller
Truck Series (TRUCK)
True Crime
Ultimate Fighting Championship (UFC)
US
Valorant
Western
Women’s National Basketball Association (WNBA)
Women’s NCAA Basketball (WNCAAB)
World
World Cup Qualifier (WORLDCUP)
WTA Tour (WTA)
Xfinity (XFT)
XFL
0
Home Blog Page 101

Chicken and Rice “Take-Out” Dinner

0

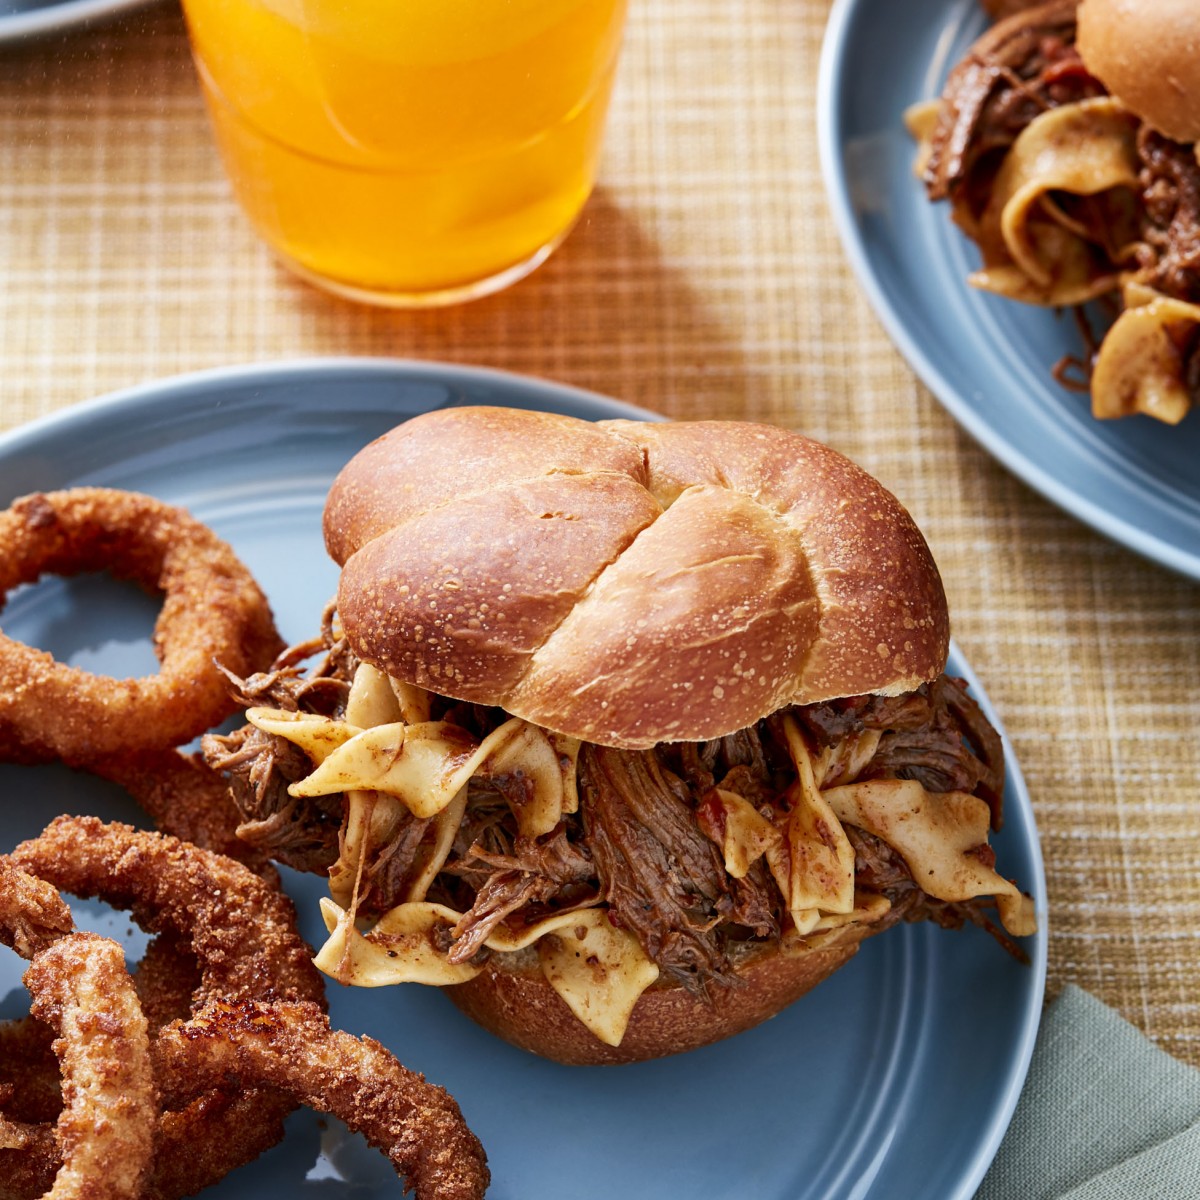
This is a healthy and satisfying dinner the will please the eye and tummy.

Enjoy with Love,

Catherine
xo
Ingredients

2 ½ lbs. boneless chicken breast
2 tbs. – soy sauce
Drizzle of sesame oil
2 tbs. – teriyaki sauce
Drizzle of lime juice
1 tbs. – oyster sauce
Drizzle of fish sauce
Dashes of salt
Dashes of black pepper
1 quart button mushrooms — sliced
1 onion — sliced
1 bunch of broccoli – blanched
Sauce:
3 vine ripe tomatoes — quartered
5 cloves garlic — chopped
1 handful of fresh basil — chopped
1 tsp. brown sugar
Dashes of salt
Dashes of black pepper
1 tbs. Worcestershire sauce
Rice:
2 cups uncooked rice
Dash of turmeric
Dash of ground ginger

Preparation

1. Prepare rice with a dash of turmeric and a dash of ginger in the water while cooking.
2. Heat a large frying pan and a griddle.
3. Place the chicken breasts in a bowl and add the soy sauce, teriyaki sauce, line juice, oyster sauce and fish sauce and toss.
4. Drizzle a little olive oil in the heated frying pan and add the chicken to cook and achieve a beautiful golden color. You can tell if the chicken is done by the firmness of the meat.
5. Drizzle a little olive oil on the griddle and place the sliced mushrooms and onions to grill.
6. Season the mushrooms and onions with a dash of salt and black pepper.
7. Place the blanched broccoli on the heated griddle and drizzle with olive oil. Season the broccoli with a little salt and black pepper.
8. When the chicken is cooked place it on a platter.
9. In the same pan the chicken was cooked in, drizzle a little olive oil and place the tomatoes, basil and garlic. Add the Worcestershire sauce, black pepper, salt and brown sugar. Sauté until the tomatoes are soft and the garlic is fragrant. This will only take a minute or two.
10. Top the onions, mushrooms and chicken with the tomato sauce. Garnish the plate with the grilled broccoli and serve with the rice.
Credit: Foodista

Risotto with Sausage and Arugula

0

For this easy risotto, the sausage isn’t browned, allowing its texture to remain tender even after pressure cooking. Use whichever you prefer, hot or sweet Italian sausage, and if you can purchase it in bulk rather than links, even better, as there’s no casing to remove. You can serve this as a first course, but it contains both sausage and arugula, so it also is satisfying as a light main dish. A summer tomato or shaved zucchini salad would be an excellent complement, as would ribbons of radicchio tossed with sliced fresh fennel and a simple vinaigrette.

INGREDIENTS

  • 5  tbsp  salted butter  cut into  1 tbsp  pieces, divided
  • 1  cup  arborio or carnaroli rice
  • 4  medium garlic cloves  ï¬nely chopped
  • 8  oz  sweet or hot Italian sausage  casing removed, sausage broken into  1/2 inch  pieces
  • 1 1/2  oz  Parmesan cheese  ï¬nely grated (3/4 cup), plus more to serve
  • kosher salt
  • ground black pepper
  • 4  cups  lightly packed baby arugula  (2 1/2 ounces), roughly chopped
  • 4  tsp  white balsamic vinegar

INSTRUCTIONS

  1. START:  On a  6-quart  Instant Pot, select  Normal/Medium Sauté. Add  1 tablespoon  of butter and let melt. Add the rice and garlic, then cook, stirring, until the grains are translucent at the edges, 1 to 2 minutes. Stir in the sausage and  2 1/2 cups  water, scraping up any bits stuck to the bottom of the pot, then distribute the mixture in an even layer.
  2. Fast:  Press Cancel, lock the lid in place and move the pressure valve to  Sealing. Select  Pressure Cook or Manual; adjust the pressure level to Low. Set the cooking time for  3 minutes. When pressure cooking is complete,  quick-release  the steam by moving the pressure valve to  Venting. Press  Cancel, then carefully open the pot.
  3. FINISH:  Vigorously stir in the Parmesan,  1 teaspoon  pepper and the remaining  4 tablespoons  butter, adding the butter one piece at a time. Add the arugula and stir until slightly wilted, about 30 seconds. Taste and season with salt, then stir in the vinegar. Serve sprin-kled with pepper and with additional Parmesan on the side.

RECIPE NOTES

Don’t break the sausage into bits smaller than ½ inch, otherwise it will overcook and dry out.

Photo Credit:- Cosori Air Fryers

Source:- Cosorithis

One Pot Barbecue Brisket Ragu with Noodles

0

If your brain works at all as ours do, you’ve wondered what sort of magic you could create by using brisket as a pasta sauce. Ta da! This recipe gives you a one-pot wonder: brisket along with noodles cooked right in a homemade barbecue sauce, a meal that doesn’t need much more than iced tea to complete it. Notice that because of the brown sugar in the sauce, the second cooking under pressure is only at high (not max). Use only a flat-cut (sometimes called a “first-cut”) brisket because it’s less fatty and won’t weigh down the sauce.

INGREDIENTS

  • 1  tbsp  canola  vegetable, or other neutral-flavored oil
  • 2 1/2  lbs  flat-cut (or first-cut) beef brisket  trimmed of any fat globs
  • 14  oz  diced tomatoes  (sa>one can) packed in juice, drained through a sieve or colander into a bowl, the juice reserved
  • 2  cups  beef broth
  • 2  tbsp  apple cider vinegar
  • 1 1/2  tbsp  mild smoked paprika
  • 1  tbsp  Worcestershire sauce
  • 1  tbsp  jarred yellow mustard
  • 1  tsp  ground coriander
  • 1/2  tsp  ground cumin
  • 1/2  tsp  ground cloves
  • 2  tbsp  dark brown sugar
  • 12  oz  raw dried wide egg or no-yolk noodles

INSTRUCTIONS

  1. Press  Saute  and set it for Medium, Normal or custom  400 °F. Set time for  20 minutes. If needed press Start.
  2. As the pot heats, warm the oil in the insert set in a 5-, 6-, 8-, or 10-quart Instant Pot. Add the brisket and brown it well on both sides, turning once, about 12 minutes total. Plenty of dark brown marks on the meat = plenty of flavor. When done, transfer the brisket to a nearby large plate or cutting board.
  3. Pour the liquid from the drained tomatoes into the pot and scrape all the browned bits on the pot’s bottom. Stir in the broth, vinegar, smoked paprika, Worcestershire sauce, mustard, coriander, cumin, and cloves. Turn off the heat.
  4. Place a pressure- and food-safe rack or trivet in the insert. The liquid may come a bit above the rack itself. Set the brisket flat side down on the rack. Pour the tomatoes on top of the meat, then sprinkle the tomatoes and meat evenly with the brown sugar. Lock the lid on the pot.
  5. For the Max model:  Set the pot for  Pressure Cook. Set the level to  MAX. Set the time for  55 minutes  with the Keep Warm setting off.
    For other models:  Set pot for  Pressure Cook or Manual on High Pressure. Set time for  1 hour and 10 minutes  with the Keep Warm setting off.
    For the Slow Cooker Function:  Set pot for  Slow Cook on High. Set time for  6 hours  with the Keep Warm Setting off.
  6. When the pot has finished cooking under pressure, turn it off and let the pressure return to normal  naturally, about 35 minutes. Whichever cooking method you’ve used, unlatch the lid and open the cooker.
  7. Use a meat fork or kitchen tongs to remove the rack from under the brisket, letting the meat fall into the sauce. Use two forks or perhaps a large spoon and a meat fork to shred the brisket into shards. Stir in the noodles and toss gently until they’re coated in the sauce without touching the bottom of the insert. Lock the lid on the pot.
  8. Set pot for  Pressure Cook or Manual  at High Pressure. Set time for  4 minutes.
  9. When the pot has finished cooking, use the quick-release method to bring the pot’s pressure back to normal. Unlatch the lid and open the pot. Stir well, then set aside for a minute or two so the noodles continue to absorb the sauce. Stir again and serve warm.

RECIPE NOTES

Beyond
– For more flavor, stir 1/4 cup of your favorite barbecue sauce into the sauce in step 9 before you set the pot aside for a minute or two.
– For a spaghetti sandwich, serve on whole-wheat buns with sliced tomatoes and plenty of pickle relish – and maybe jarred (hot or “tamed”) pickled jalapeño rings as well.

Other Pots
– For a 3-quart Instant Pot, you must halve all of the ingredient amounts.
– For a 10-quart Instant Pot, you can increase all of the ingredient amounts by 50 percent but you must then also increase the cooking time in step 5 to 1 hour 20 minutes on HIGH (there is no MAX setting in the larger pot as of this writing).

Photo Credit:- Cosori Air Fryers

Source:- Cosorithis

Chicken and Rice Stir-Fry with Fresh Orange, Dried Cherries, and Pecans

0

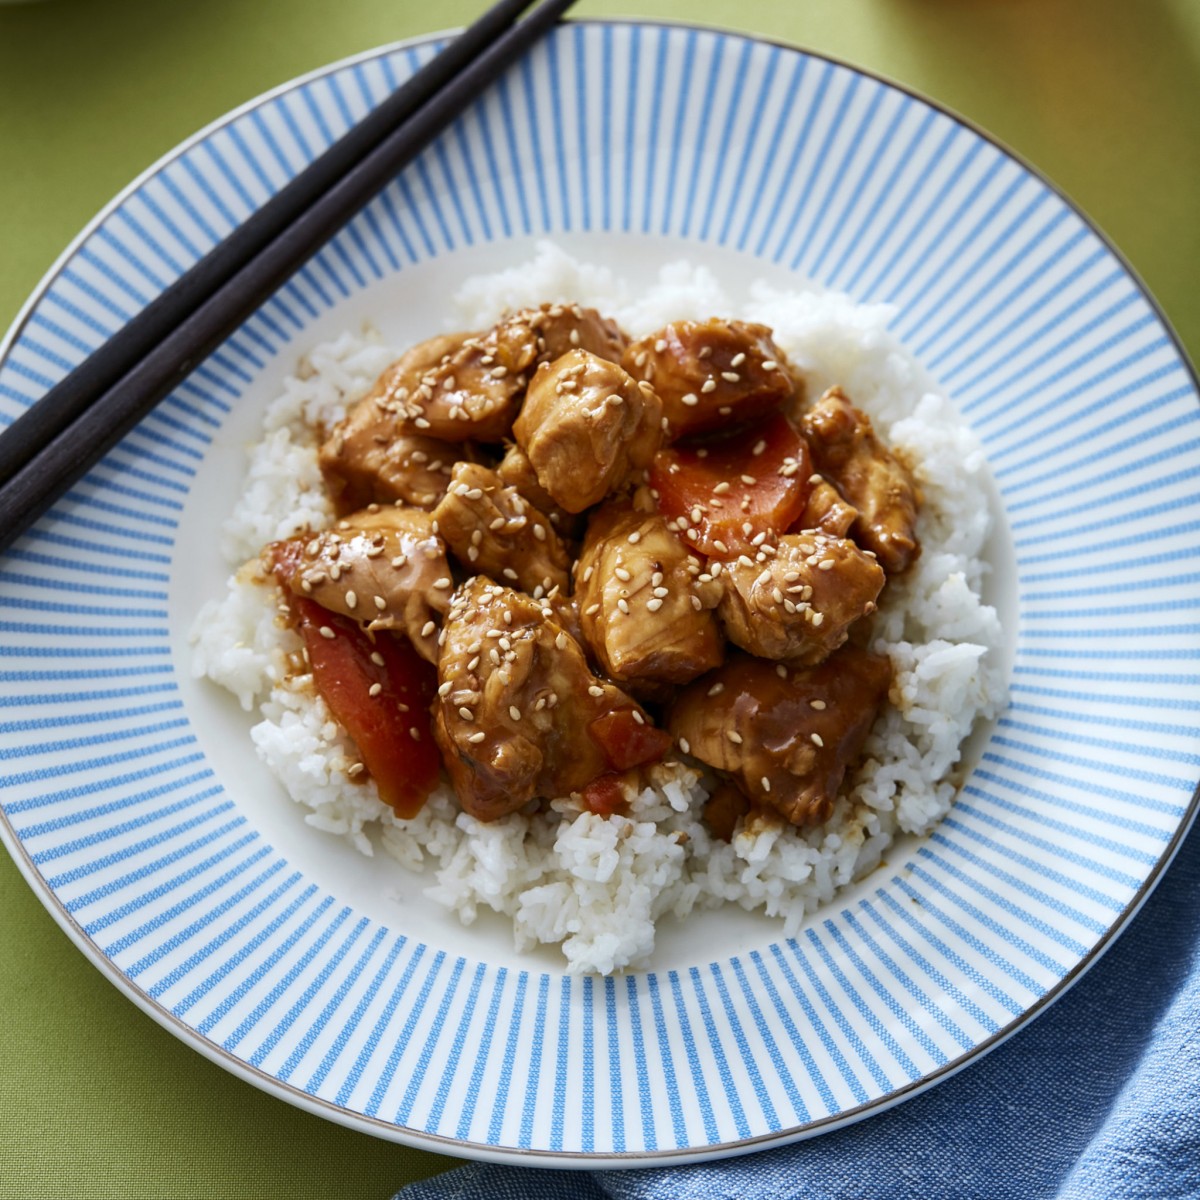
This simple stir-fry of lean chicken breast and white rice is flavored with a sweet-and-sour, slightly spicy sauce. The fruit and pecans add extra flavor for a sweet, nutty finish.

Note: Sesame oil is not generally recommended for stir-frying because of its low smoke-point. In this dish, it is used to flavor the sauce and to quickly (20-30 seconds) fry the garlic and ginger. Peanut oil–with a high smoke-point–is used for the main stir-fry.
Ingredients

For the Sauce
1/3 cup soy sauce
1/3 cup chicken broth
1/4 cup rice wine vinegar
2 tbsp sugar
1 tbsp ground chile paste (such as Sambal Oelek)
2 tbsp sesame oil, divided
1 tbsp cornstarch
2 tbsp water
1 garlic clove, finely chopped
1 1-inch piece of ginger, peeled and finely chopped
For the Chicken and Rice Stir-Fry
1 tbsp peanut oil
2/3 lb boneless, skinless chicken breast, cut into bite-sized chunks
sea salt
freshly ground black pepper
2 cups cooked white rice
1 naval orange, peel and pith removed, sections sliced in half crosswise
1/3 cup dried cherries
1/2 cup broken pecan pieces
cilantro leaves, for serving

Preparation

1. Whisk the soy sauce, chicken broth, vinegar, sugar, chile paste, and 1 tablespoon of sesame oil in a small bowl and set aside.
2. Whisk the cornstarch and water in another small bowl until the cornstarch is completely dissolved. Set aside.
3. Heat a wok over medium-high heat and add the remaining 1 tablespoon of sesame oil. Add the garlic and ginger and stir-fry 20-30 seconds. Add the soy sauce mixture and simmer 3 minutes. (Reduce the heat if the mixture comes to a hard boil.)
4. Re-whisk the cornstarch mixture and add to the wok. Stir well until the sauce is slightly thickened, 1-2 minutes. Pour into a bowl and set aside. Do not wipe out the wok.
5. Add the peanut oil to the wok over medium-high heat. Season the chicken with salt and pepper and add to the wok. Stir-fry until the chicken is just cooked through, 4-5 minutes.
6. Add the rice and stir-fry until hot throughout, about 1 minute.
7. Re-whisk the sauce and add to the wok. Simmer 1 minute.
8. To serve, divide the chicken mixture among 4 plates or shallow bowls. Top each with the orange slices, cherries, and pecans. Scatter cilantro over all and serve right away.
Credit: Foodista

Not Really Panda Express’s Orange Chicken

0

We’ve simplified this popular dish by using chicken tenders, which cook more quickly in the flavorful sauce – made with lots of orange juice and a little orange zest for a brighter flavor. The dish is fairly sweet, so don’t stint on the garlic which will balance the flavors. You can even double the garlic, if you want! There’s no soy sauce or vinegar here, just as in the original recipe. That said, you could add up to 2 tablespoons unseasoned rice vinegar with the other ingredients for a more sophisticated take.

INGREDIENTS

  • 2  lbs  chicken tenders  each cut into 4 pieces
  • 3  medium carrots  thinly sliced (1 1/2 cups)
  • 3  medium garlic cloves  minced (1 tbsp)
  • 1  tbsp  finely grated fresh orange zest  from about  2 medium oranges
  • 1  cup  pulp-free orange juice
  • 1/3  cup  Hoisin Sauce  (gluten-free if necessary )
  • 3  tbsp  granulated white sugar
  • 1/2  tsp  table salt
  • 1/2  tsp  ground black pepper
  • 1 1/2  tbsp  dditional water
  • 1  tbsp  cornstarch

INSTRUCTIONS

  1. Stir the chicken, carrots, garlic, zest, orange juice, hoisin sauce, sugar, salt, and pepper in the insert set in a 5-, 6-, or 8-quart Instant Pot until the sugar dissolves and the mixture is uniform. Lock the lid onto the cooker.
  2. For Pressure Cook:  Set the Instant Pot for  Pressure Cook or Manual  and set the pressure level to  LOW. The valve must be closed. Set the time for  6 minutes  with the Keep Warm Setting off.
    –OR–  <br< <strong=””>For Slow Cook: Set the Instant Pot for  Slow Cook  and set the level to  High. The valve must be open. Set the time for  2 hours  with the Keep Warm setting off.</br<>
  3. When the pot has finished cooking under pressure, use the quick- release method to bring the pressure back to normal. Whichever cooking method you’ve used, unlatch the lid and open the cooker. Whisk the water and cornstarch in a small bowl until smooth.
  4. Press  Sauté  and set it for Medium, Normal or Custom  300 °F. Set the time for 5 minutes.
  5. Stir quite often while the chicken mixture comes to a simmer. Stir in the cornstarch slurry and continue cooking, stirring almost constantly, until bubbling and thickened, less than 1 minute. Turn off the heat and use hot pads or silicone baking mitts to remove the (hot!) insert to a nearby wire rack. Cool for 2 to 3 minutes before serving warm.

RECIPE NOTES

Other Pots
– For a 3-quart Instant Pot, you must halve all of the ingredient amounts.
– For an 8-quart Instant Pot, you can increase all of the ingredient amounts by 50 percent.

Beyond
– Sprinkle servings with sesame seeds and/or the minced scallions.
– The dish needs a good batch of rice as its base.
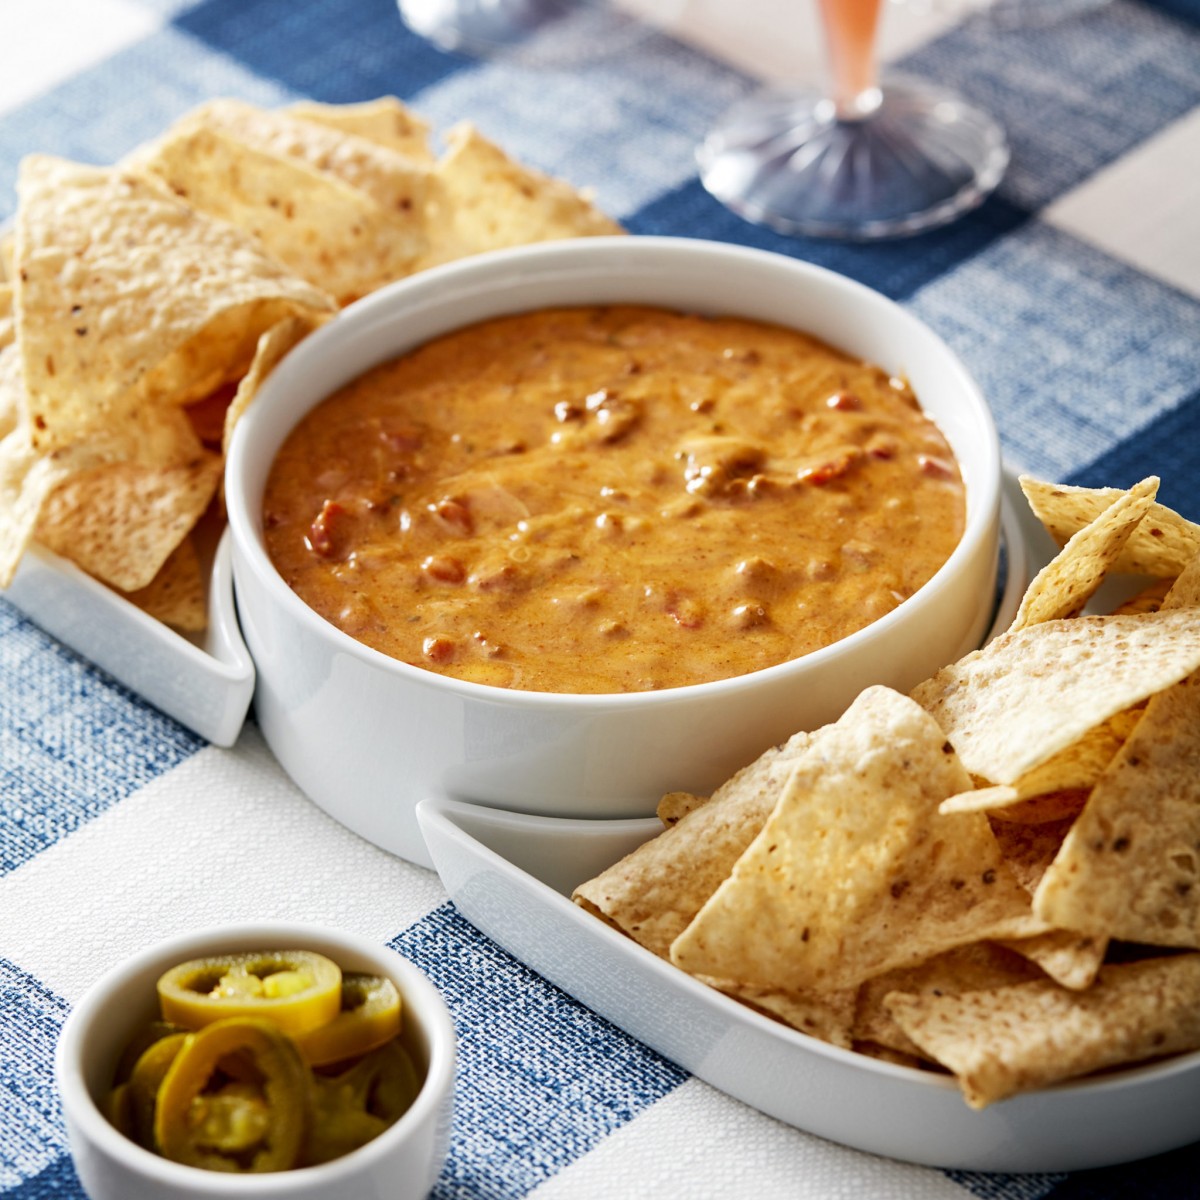
Photo Credit:- Cosori Air Fryers

Source:- Cosorithis

Not Really Chili’s Queso Dip

0

It’s hard to make a copycat version of this restaurant favorite on a stovetop, given the way the cheese can burn, even with constant stirring. The only way to make a smooth, creamy dip every time is with the PIP (pot-in-pot) method in an Instant Pot. Even so, we still wanted to up the game (as you well know by now). Most copycat recipes use 100 percent Velveeta; we supplement it with sharp American cheddar for better flavor. The smoked paprika offers a bit of “hearth” or “grill” flavor. And we save the lime juice for the end for a brighter, fresher taste.

INGREDIENTS

  • 1 1/2  cups  Water
  • 1  can chili without beans (15 oz)  such as Wolf Brand Chili No Beans or Skyline Original Chili,  2 cups
  • 8  oz  Velveeta cheese  shredded
  • 8  oz  American sharp cheddar cheese  shredded (2 cups)
  • 1  cup  whole or low- ­fat milk  do not use fat-free
  • 1  tbsp  mild smoked paprika
  • 2  tsp  ground cumin
  • 1  tsp  dried oregano
  • 1/2  tsp  thin red hot sauce  such as Texas Pete (can use less)
  • 1  tbsp  lime juice

INSTRUCTIONS

  1. Pour the water into the insert set in a 5-, 6-, or 8-quart Instant Pot. Set a pressure-safe rack or trivet into the pot.
  2. Stir the chili, Velveeta, cheddar, milk, smoked paprika, cumin, oregano, and hot sauce in a  2 quart, 7-inch-round, high-sided, pressure-safe baking or soufflé dish. Cover the dish tightly with aluminum foil and set it on the rack. Lock the lid on the cooker.
  3. MAX model:  Set the pot for  Pressure Cook  and set the pressure to  MAX. Set the time for  17 minutes  with the Keep Warm Setting off.
    For other models:  Set the pot for  Pressure Cook or Manual  and set the pressure to HIGH. The valve must be closed. Set the time for  20 minutes  with the Keep Warm setting off.
  4. When the pot has finished cooking, use the  quick-release method  to bring the pressure back to normal. Unlatch the lid and open the cooker. Use hot pads or silicone baking mitts to transfer the (hot!) baking dish to a nearby wire rack. Stir in the lime juice (perhaps also re-emulsifying the dip). Let sit for 5 minutes to blend the flavors and thicken slightly before serving.

RECIPE NOTES

Beyond
– Garnish the dip with stemmed and minced fresh cilantro leaves.
– For more flavor (and color), stir one 4-ounce jar diced pimientos,
drained and rinsed, into the mixture with the cheese.

Other Pots
– For a 3-quart Instant Pot, you must halve almost all of the ingredient amounts except you must use 1 cup water in the insert. You must also use a 1-quart, 6-inch-round, high-sided, pressure-safe baking or soufflé dish.
– For a 10-quart Instant Pot, you must increase the amount of water in the insert to 21/2 cups while otherwise completing the recipe as stated.
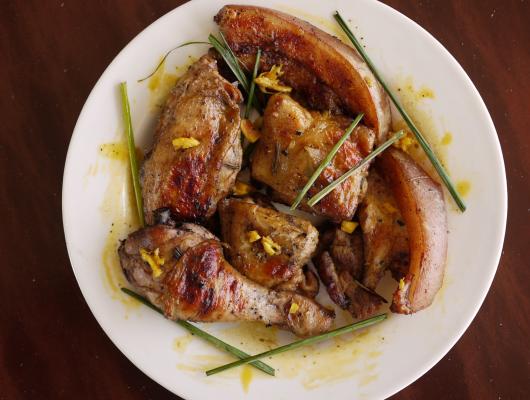
Photo Credit:- Cosori Air Fryers

Source:- Cosorithis

Chicken and Pork Inasal

0

Classic Filipino – an homage to Bacolod’s authentic inasal – succulent, savory, sour, garlicy

Ingredients

6 — 8 pieces chicken leg and thigh + 1 kg pork belly
Marinade:
3 bulbs garlic (minced; you can use a food processor)
a 3 inch knob of ginger (minced; you can use a food processor)
juice of 4 lemons
3 / 4 cup vinegar (I used apple cider vinegar)
2 tablespoons rock salt
1 tablespoon freshly cracked pepper
1 lemongrass/tanglad stalk, roughly chopped
1 tablespoon sugar
for the Achuete — Margarine mix
1/4 cup vegetable oil
3-4 tablespoons annatto/achuete seeds
1 small tub Star Margarine (get the smallest tub out there)
two spoonfuls of the garlic and ginger used in the marinade
1/2 tablespoon freshly cracked pepper

Preparation

1. for the achuete-margarine mix:
2. In a small saucepan, heat the oil. Add the achuete seeds and allow oil to color. Once the desired rich orange color is achieved, remove from heat.
3. Strain the oil into a cup to remove the seeds.
4. Using the same pan, melt the margarine until hot and frothy.
5. Add the garlic and ginger and allow to toast. Add the pepper.
6. When done, remove from heat and use it for basting the meat.
7. Marinade and Grilling:
8. Mix all the marinade ingredients together and adjust taste to your preference.
9. Add the meat and marinade for at least two hours or overnight.
10. Grill the meat, alternately basting with the achuete-margarine mix and the marinade. Be careful not to let the meat burn.
11. Serve with a steaming cup of rice. Dipping sauce (soy sauce, vinegar, chili) is optional. Enjoy!
Credit: Foodista

Duo Crisp + Air Fryer – One Pot Cheesy Beef and Rice Casserole

0

INGREDIENTS

  • 1  lb  ground beef  preferably 93%
  • 1 1/4  cup  beef broth
  • 1  cup  uncooked long grain rice  rinsed
  • 1  cup  chopped carrots
  • 1  cup  frozen peas (or other frozen vegetable  or double the carrots)
  • 10.75  oz  condensed cream of mushroom soup  canned or homemade
  • 1 1/2  cups  shredded Cheddar cheese

INSTRUCTIONS

  1. Add ground beef to the Instant Pot. Using the display panel select the  SAUTE  function, adjust to  HIGH  and select  START.
  2. Brown the meat until no pink remains, then select  CANCEL. Drain fat. Transfer browned meat to a shallow dish and cover loosely with foil.
  3. Add broth to the pot and deglaze by using a wooden spoon to scrape the brown bits from the bottom of the pot. 
  4. Add the rinsed rice and stir. 
  5. Add the vegetables, cooked beef and soup to the pot, in that order. Do not stir. Secure the  Pressure Cooking  Lid.
  6. Using the display panel select the  PRESSURE COOK  function. Adjust the time to  15 minutes, then select  START.
  7. When the time is up, let the pressure  naturally release for 10 minutes, then  quick-release  the remaining pressure.
  8. Stir the ingredients to combine, then level the top and add cheese in an even layer.
  9. Select  CANCEL, then secure the >strong>Air Fryer Lid .
  10. Using the display panel select the  BROIL  function. Adjust the temperature to  400 °F  and the time to  5 minutes, then select  START.
  11. When cheese is well melted and beginning to brown, remove the lid and place on the protective pad. Scoop into individual bowls and serve hot.

    Photo Credit:- Cosori Air Fryers

           Source:- Cosorithis

Duo Crisp + Air Fryer – Coconut Curry with Crispy Tofu

0

INGREDIENTS

  • 14-16  oz  extra firm tofu
  • 2  tbsp  soy sauce
  • 2  tbsp  toasted sesame oil
  • 1  garlic clove  minced
  • 1  tbsp  olive oil
  • 1  small onion  finely diced
  • 1  head broccoli  cut into florets
  • 1  red pepper  chopped
  • 2  yellow squash  cut into half moons
  • 2  tbsp  red curry paste
  • 2  tsp  kosher salt
  • 15  oz  can of coconut milk
  • 2  cups  Cooked rice  for serving
  • chopped cilantro  for garnish (optional)

INSTRUCTIONS

  1. Open tofu, drain, then enclose in a clean towel and press by setting a heavy pan on top of it for 15 minutes. Drain well, then cut into 1/2 inch cubes. 
  2. Combine soy sauce, toasted sesame oil and garlic in a zip-top bag, add tofu and marinate for 15 minutes. 
  3. Meanwhile, add olive oil to the Instant Pot. Using the display panel select the  SAUTE  function, then  START. When olive oil is hot, add the onions to the pot and saute until soft, 3-4 minutes. 
  4. Add broccoli, red pepper, squash, curry paste and salt. Cook and stir until curry paste is evenly distributed, 2-3 minutes.
  5. Add coconut milk and stir to combine. 
  6. Press  CANCEL, then secure the  Pressure Cooking Lid. Using the display panel select the  PRESSURE COOK  function. Adjust the time to  0 minutes, then select  START. 
  7. When the time is up,  quick-release  the pressure. Select CANCEL, then empty the vegetables and curry sauce into a serving dish and cover loosely with foil. Rinse the pot and return it to the cooker base.
  8. Drain the tofu. Place half the tofu in the bottom of the  Air Fryer Basket. Insert the Broil Tray and place the remaining tofu on the Broil Tray. 
  9. Place the Air Fryer Basket on its base and lower into the pot. Secure the Air Fryer Lid. Using the display panel, select the  AIR FRY  function. Adjust the temperature to  375 °F  and the time to  15 minutes, then select  START.
  10. When the display indicates  “Turn Food”, remove the Air Fryer Basket and shake the tofu to ensure even cooking (be sure to always place the hot lid on the protective pad). Replace the basket and Air Fryer Lid and continue cooking. 
  11. Serve rice topped with tofu and curried vegetables. Garnish with cilantro (optional).

    Photo Credit:- Cosori Air Fryers

           Source:- Cosorithis

Chicken and lentil stew with cumin pitta

0

Harissa chicken stew with cranberries and lentils. Homemade cumin pittas to go with it.

Ingredients

For the stew:
1 tbsp olive oil
1 small onion, chopped
2 tsp harissa
2 chicken breasts, chopped
1 tin of puy lentils, drained
2 carrots, peeled and cut into sticks
400ml vegetable stock
4 tbsp tomato puree
2 tbsp cranberry sauce
splash of white wine
1 tsp cornflour (dissolved in a little cold water)
1 tsp cinnamon
2 bay leaves
handful of chopped coriander
For the pittas (makes 4)
190g strong white flour
60g wholemeal flour
1/2 tbsp cumin seeds, toasted
1/2 tsp salt
1 tsp dried yeast
1/4 tsp granulated sugar
150ml warm water
1 tbsp olive oil

Preparation

1.Start by making the pittas. Mix the flours, cumin seeds and salt in a bowl. Separately dissolve the yeast and sugar in a little of the warm water
2. Make a well in the centre of the flour and add the yeast mixture, olive oil and enough of the remaining water and slowly incorporate the wet ingredients to make a firm but soft dough
3. On a floured surface knead the dough for a good 10 minutes (here’s where you burn all your calories) or until smooth and elastic in texture. Place in an oiled bowl, cover and leave it to rise for 1 hour or until it has doubled in size. I like to wrap the bowl in a duvet, it works like a treat
4. Knock back the dough for 2-3 minutes, then cover and prove again for 5 minutes.
5. Divide the dough into 4 and shape it into little rolls on a floured surface and with a rolling pin flatten the dough into the characteristic oval pitta shape. Cover and prove for 10 minutes
6. Preheat the oven to 220C and get started on the stew: in a heavy based pan let the oil get hot and brown the chicken. Remove from pan and set aside
7. Fry the onion and harissa until the onion softens. Add lentils and carrots and fry for a couple of minutes
8. Return the chicken to the pan and add all remaining ingredients. Cover and cook it on medium to low heat for about 30-50 minutes
9. Lightly cover a baking tray (or even better a clay baking stone if you have one) with flour and preheat in the oven for 5 minutes. Place the pittas on the hot baking tray and bake for 5-10 minutes or until they are puffed up.
10. Serve the stew with the pittas while they are still warm.
Credit: Foodista