Post a Free Blog

Submit A Press Release

At CWEB, we are always looking to expand our network of strategic investors and partners. If you're interested in exploring investment opportunities or discussing potential partnerships and serious inquiries. Contact: jacque@cweb.com

Generic selectors
Exact matches only
Search in title
Search in content
Post Type Selectors
Filter by Categories
Action
Animation
Anime
ATP Tour (ATP)
Auto Racing
Baseball
Basketball
Boxing
Breaking News
Business
Business
Business Newsletter
Call of Duty (CALLOFDUTY)
Canadian Football League (CFL)
Car
Celebrity
Champions Tour (CHAMP)
Comedy
CONCACAF
Counter Strike Global Offensive (CSGO)
Crime
Dark Comedy
Defense of the Ancients (DOTA)
Documentary and Foreign
Drama
eSports
European Tour (EPGA)
Fashion
FIFA
FIFA Women’s World Cup (WWC)
FIFA World Cup (FIFA)
Fighting
Football
Formula 1 (F1)
Fortnite
Golf
Health
Hockey
Horror
IndyCar Series (INDY)
International Friendly (FRIENDLY)
Kids & Family
League of Legends (LOL)
LPGA
Madden
Major League Baseball (MLB)
Mixed Martial Arts (MMA)
MLS
Movie and Music
Movie Trailers
Music
Mystery
NASCAR Cup Series (NAS)
National Basketball Association (NBA)
National Football League (NFL)
National Hockey League (NHL)
National Women's Soccer (NWSL)
NBA Development League (NBAGL)
NBA2K
NCAA Baseball (NCAABBL)
NCAA Basketball (NCAAB)
NCAA Football (NCAAF)
NCAA Hockey (NCAAH)
Olympic Mens (OLYHKYM)
Other
Other Sports
Overwatch
PGA
Politics
Premier League (PREM)
Romance
Sci-Fi
Science
Soccer
Sports
Sports
Technology
Tennis
Thriller
Truck Series (TRUCK)
True Crime
Ultimate Fighting Championship (UFC)
US
Valorant
Western
Women’s National Basketball Association (WNBA)
Women’s NCAA Basketball (WNCAAB)
World
World Cup Qualifier (WORLDCUP)
WTA Tour (WTA)
Xfinity (XFT)
XFL
0
Home Blog Page 87

Tortilla Soup

0
Photo Credit:- Cosori Air Fryers
This recipe seems like a bit of wizardry. By starting with frozen quesadillas, you can transform enchilada sauce and broth into a fast tortilla soup. The recipe works because the filling in those quesadillas (the vegetables, meat, cheese, chiles, and whatever else) falls out and adds body to the soup while the tortillas thicken the enchilada sauce as they expand and thaw. When you open the pot, you’ll find the tortillas on top have puffed up. Don’t worry– you’ll cut them down to smaller bits. Use either corn or flour quesadillas– and any variety you like. We found this soup worked best with the frozen quesadillas that come two to a 12-ounce  package. But in the end, since this dish is a soup, not a stew, there’s leeway for the types and sizes of quesadillas you can use.

INGREDIENTS

  • 2 1/4  cups  red enchilada sauce  19‑ounce  can
  • 2  cups  chicken  or vegetable broth
  • 1  tsp  stemmed fresh thyme leaves  or  1/2 tsp  dried thyme
  • 1/2  tsp  ground cinnamon
  • 1/2  tsp  ground cumin
  • 6-8  frozen quesadillas  or gluten-free quesadillas of any flavor

INSTRUCTIONS

  1. Press the button SAUTÉ. Set it for HIGH, MORE, or CUSTOM  400 °F  and set the time for  10 minutes.
  2. Stir the enchilada sauce, broth, thyme, cinnamon, and cumin in an Instant Pot. Cook, stirring occasionally, until several wisps of steam come up off the sauce. Add the frozen quesadillas to the sauce without pushing them to the bottom of the pot. (The tops of a couple of the quesadillas will perhaps not be touched by the sauce.) Lock the lid onto the pot.
  3. Option 1  Max Pressure Cooker
    Press Pressure cook on Max pressure for  5 minutes  with the Keep Warm setting off.
  4. Option 2  All Pressure Cookers
    Press Soup/Broth or Pressure cook (Manual) on High pressure for  8 minutes  with the Keep Warm setting off. The valve must be closed.
  5. Use the  quick- ­release method  to return the pot’s pressure to normal. Unlatch the lid and open the pot. Use cleaned kitchen shears to cut up the quesadillas, or pull them to rough shreds with two forks. Serve the soup by scooping up the broth with bits of the tortillas and their (former) filling.

RECIPE NOTES

Beyond
– For an  8-quart  Instant Pot, you must increase the broth to  3 cups.
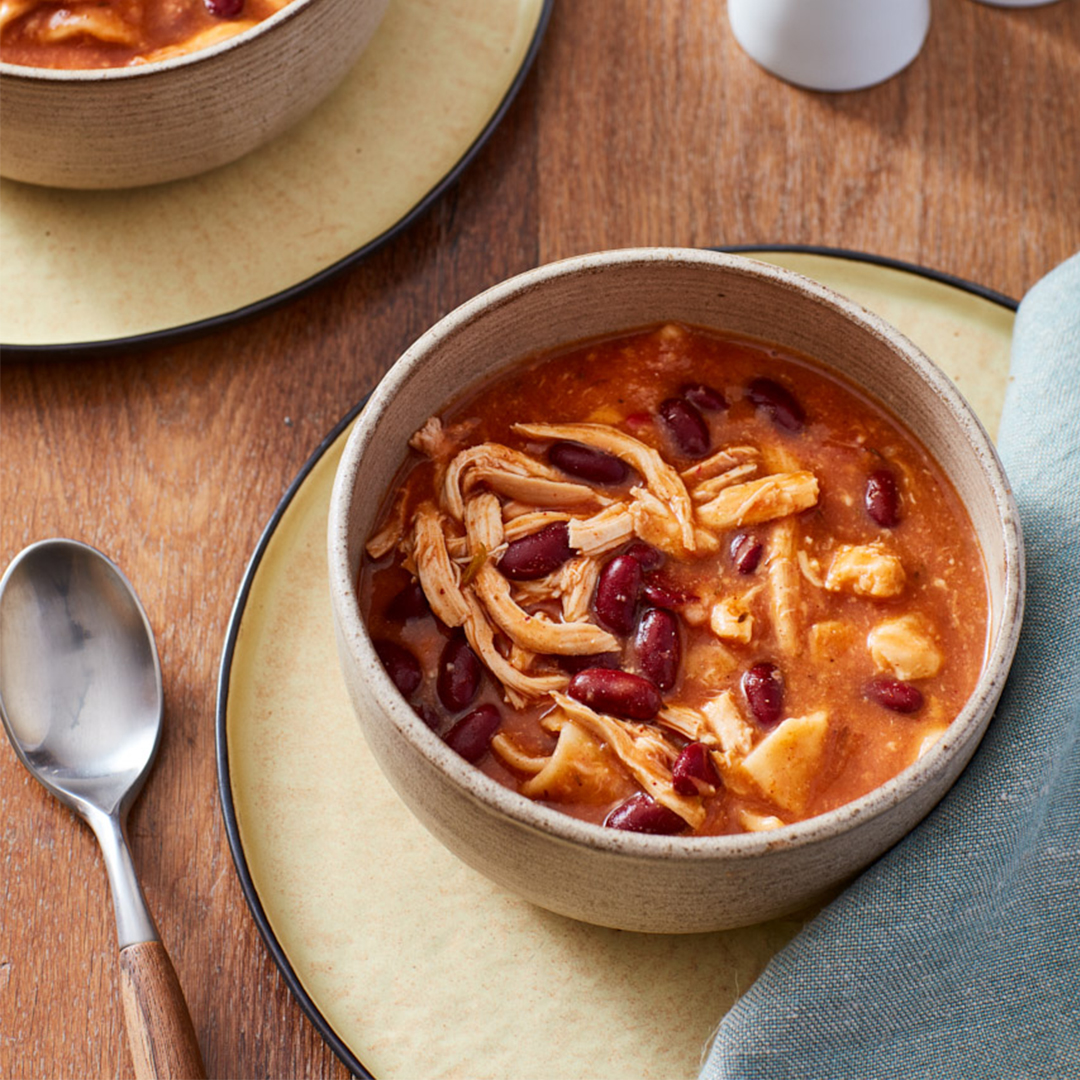
– For a heartier soup, add one drained and rinsed  15-ounce  can of black or red kidney beans or one drained  15-ounce  can of corn to the pot after you release the pressure and cut up the quesadillas. Simmer on the SAUTÉ function at MEDIUM, NORMAL, or CUSTOM  300 °F  for 2—3 minutes, stirring often, just to heat the beans and corn through.

– For a thicker stew, add  one of those cans  of vegetables mentioned above, plus up to  1 pound  chopped, skinned,and deboned rotisserie chicken meat. Simmer in the same way.

Source:- Cosorithis

Simple Steamed Salmon Fillets

0
Photo Credit:- Cosori Air Fryers
Over the last year, we’ve seen a lot of worry on social media about how to cook frozen salmon fillets in an Instant Pot. And no wonder! The fillets can be overcooked in a flash. We find the best technique is to steam them on a rack because they don’t sit in the liquid (which can break them apart, especially during the furious boil inside the pot when the pressure is released). Our timing here is for medium-rare to medium salmon fillets. If you like them cooked more thoroughly, add 1 minute to the timing for either the MAX or the HIGH setting. But note: The size of these salmon fillets (6 ounces each) is very important for the timing given; see the Beyond if you have larger fillets.

INGREDIENTS

  • 1  cup  water or dry white wine of any sort
  • 2  frozen skin‑on salmon fillets  (6‑ounces  each)
  • 4  paper- ­thin fresh lemon slices  any seeds removed
  • 1/2  tsp  ground black pepper
  • 1/4  tsp  table salt

INSTRUCTIONS

  1. Pour the water or wine into an Instant Pot. Set the pot’s rack (with the handles up) or a large, open vegetable steamer inside the pot. Set the fillets skin-side down on the rack or in the steamer, arranging them so they overlap as little as possible (do not stack them). Set two barely overlapping lemon slices on each fillet. Sprinkle the fish and lemon slices evenly with the pepper and salt. Lock the lid onto the cooker.
  2. Option 1  Max Pressure Cooker
    Press Pressure cook on Max pressure for  5 minutes  with the Keep Warm setting off.
  3. Option 2  All Pressure Cookers
    Press Meat/Stew or Pressure cook (Manual) on High pressure for  6 minutes  with the Keep Warm setting off. The valve must be closed.
  4. Use the quick- ­release method to bring the pot’s pressure back to normal. Unlatch the lid and open the cooker. Use a metal spatula to transfer the fillets one by one to serving plates

RECIPE NOTES

Beyond
– For an 8-quart Instant Pot, you must use 1 1/2 cups water or white wine. You can also use  three<.sa> frozen  6-ounce  fillets. (Four would be too many and begin to stack on top of each other.)
– You can add lots more flavor by sprinkling 1 ⁄2 teaspoon dried seasoning blend on each fillet before adding the lemon slices.
– If you’ve got frozen  8-ounce  fillets, cook them at MAX for 6 minutes or at HIGH for 7 minutes, followed by a quick release.
– These salmon fillets are great over riced cauliflower or on top of a kale Caesar salad

Source:- Cosorithis

Chicken Suzie

0

Chicken Suzie is a tender chicken breast rolled around asparagus spears and baked in a Marsala wine sauce.

It was Awesome and I am a beef guy…
It isn’t what we had planned.
You know how things just happen.

But it was real good eatin, and the smoked garlic gave me the idea for the garlic pie I made.

Remember that a recipe is simply an outline; it is not written in stone.
Don’t be afraid to make changes to suit your taste.
Take it and run with it….
Enjoy,
Ken & Patti

Ingredients

Chicken  Suzie
Prep Time: 15 minutes
Cook Time: 35 minutes @ 350 F
Ingredients:
4  chicken breasts,  boneless, skinless
12  fresh asparagus  spears
1  can  cream of chicken soup
1 cup  Marsala wine
1/4 cup  crushed  garlic
3 teaspoons  rosemary
1 teaspoon  white pepper

Preparation

1. Directions: Chicken Suzie
2. Preheat oven  to 350 degrees.
3. Roll  each breast around 4 spears of asparagus and place seam side down in a greased  baking  dish.
4. Wash  your hands.
5. Combine remaining ingredients in a small bowl. Pour over the chicken, lifting it a little to distribute the sauce.
6. Bake  for 35 minutes.
Credit: Foodista

Cod Fillets with Tomatoes andZucchini

0
Photo Credit:- Cosori Air Fryers
The flavors here are sort of like ratatouille, but minus the eggplant. However, the final consistency of the vegetables surrounding the fish is more like a sauce because the vegetables are just about melted down by the pot’s pressure in the two-step cooking process. If you find the sauce is too thin after cooking, remove the fish from the pot and boil the sauce down with the SAUTÉ function on MEDIUM, NORMAL, or CUSTOM  300 °F  for a few minutes. Even so, we find that a little bit of, well, wateriness in the sauce brings a lightness to the overall dish. One note: It may seem strange, particularly in an 8-quart cooker, that there’s no additional liquid with the tomatoes and other vegetables. The zucchini will throw off so much liquid that the pot will come to pressure without any burn notice. Just remember to use only diced tomatoes packed in juice.

INGREDIENTS

  • 28  ounces  diced tomatoes packed in juice  3 1/2 cups
  • 10  ounces  frozen sliced zucchini;  or  1 medium  zucchini sliced into  1/4- ­inch-thick rounds,  2 cups
  • 1/2  cup  frozen chopped onion  or  1 small  yellow or white onion, peeled and chopped
  • 4  ounce  diced pimientos  (1 jar); do not drain
  • 1  tbsp  dried Provençal or Mediterranean seasoning blend
  • 4  frozen skinless cod fillets  6 ounces  each

INSTRUCTIONS

  1. Stir the tomatoes, zucchini, onion, pimientos, and seasoning blend in an Instant Pot. Lock the lid onto the cooker.
  2. Option 1  Max Pressure Cooker
    Press Pressure cook on Max pressure for  3 minutes  with the Keep Warm setting off.
  3. Option 2  All Pressure Cookers
    Press Pressure Cook or Manual on High pressure for  4 minutes  with the Keep Warm setting off. The valve must be closed.
  4. Use the  quick- ­release method  to bring the pot’s pressure back to normal. Unlatch the lid and open the cooker. Nestle the cod fillets into the sauce. Lock the lid back onto the pot.
  5. Option 1  Max Pressure Cooker
    Press Pressure cook on Max pressure for  5 minutes  with the Keep Warm setting off.
  6. Option 2  All Pressure Cookers
    Press Pressure Cook or Manual on High pressure for  6 minutes  with the Keep Warm setting off. The valve must be closed.
  7. Again, use the  quick- ­release methodto bring the pot’s pressure back to normal. Unlatch the lid and open the cooker. Use a large cooking spoon to transfer the fish and sauce to serving bowls.

RECIPE NOTES

Beyond
– If you don’t want to use a Provençal or Mediterranean seasoning blend, substitute  1 teaspoon  lemon pepper seasoning,  1 teaspoon  dried marjoram, and  1 teaspoondried thyme.
– Garnish each serving with  1 tablespoon  butter or a generous drizzle of extravirgin olive oil.
– Substitute  four  frozen  6-ounce  halibut or tilapia fillets for the cod.
– Garnish with finely grated lemon zest and/or drained and rinsed capers. Or skip those and garnish each serving with a little tapenade. And don’t forget garlic toast!

Source:- Cosorithis

Butter-Poached Mahi-Mahi

0
Photo Credit:- Cosori Air Fryers
This recipe is the only “PiP” (that is, in Instant Pot terminology, “pot in pot”) recipe in this book. We found that technique too fussy for a book about getting dinner on the table straight from the freezer. However, in this one case, our last recipe, we felt the extra step was warranted because mahi-mahi is a thicker, meatier fish and takes longer to cook. It’s also expensive and we wanted to make sure the fish remains moist and delicate. When the fillets were set right on the cooker’s bottom or even in a rack, they tended to turn mushy, given the time the pot needs to stay under pressure to thaw and cook the fish. Watch the size of the frozen fillets. They must lie flat in a  7-inch  baking dish.

INGREDIENTS

  • 1/2  tsp  mild paprika
  • 1/2  tsp  onion powder
  • 1/2  tsp  table salt
  • 1/2  tsp  ground black pepper
  • 1 1/2  cups  Water
  • 4  frozen skinless mahi-mahi fillets  6 ounces  each;  5‑6‑inch- ­long
  • 8  tbsp  butter  1 stick

INSTRUCTIONS

  1. Mix the paprika, onion powder, salt, and pepper in a small bowl until uniform.
  2. Pour the water into an Instant Pot. Set the pot’s rack (with the handles up) or a pressure-safe trivet inside the pot. Set a pressure safe  7-inch  round baking dish in the cooker. (A springform pan will leak and should not be used.) Stack the fillets in the dish, sprinkling each with an even coating of the spice mixture (about  1/2 teaspoon  on each). Set the stick of butter on top of the fillets and lock the lid onto the pot.
  3. Option 1  Max Pressure Cooker
    Press Pressure cook on Max pressure for  7 minutes  with the Keep Warm setting off.
  4. Option 2  All Pressure Cookers
    Pressure cook or Manual on High pressure for  8 minutes  with the Keep Warm setting off.
  5. Use the  quick- ­release method  to bring the pot’s pressure back to normal. Unlatch the lid and open the cooker. Use silicone cooking mitts or thick hot pads to transfer the baking dish to a heat-safe work surface. Use a metal spatula to transfer the fillets one by one to serving plates or a platter. Spoon some (or all) of the buttery “sauce” in the baking dish over the fish.

RECIPE NOTES

Beyond

– If desired, substitute  four  frozen  6-ounce,  5- or 6- inch-long halibut or tilapia fillets for the mahi-mahi.
– This dish is great over a bed of steamed asparagus (particularly with all that butter sauce).

Source:- Cosorithis

Chicken Strips With Tasty Rice!

0

This is a great treat for everyone and really very easy. Go ahead a try this you will love it. Enjoy with Lots of Love,Catherine

Ingredients

2 pounds Boneless  Chicken Breast  — sliced into strips
Marinade:
1  Juice of  lemon
5 cloves  of  garlic  — crushed and  chopped
Handful of  cherry tomatoes  — halved
Handful of fresh basil-  chopped
Handful of fresh  parsley  —  chopped
Sprig of fresh  rosemary
1 Long Hot  pepper  —  chopped  with seeds
1/4 cup  of  olive oil
Coating:
2 cups  Flour  — about
4  Egg  wash — about  eggs  beaten well
3 cups  Breadcrumbs  —- seasoned with dashes of  paprika,  cayenne,
Vegetable Oil-  for frying
Rice:
1 cup  rice
Dashes of  turmeric
1/2  red onion  — sliced

Preparation

1. Place chicken in the marinade and leave it covered in the  refrigerator  for one hour to overnight.
2. Remove the chicken from the marinade and set the marinade aside for the rice.
3. Dip the  marinated  chicken in the flour then the  egg wash  and then the breadcrumbs.
4. In a large  frying  pan  heat  about 1 inch deep of vegetable oil. Carefully place the chicken in the oil and let it  fry  to a golden  color  before carefully  turning  over. Only turn the chicken once! It will take about 3-4 minutes on each side, depending on how thick you sliced the chicken.
5. Place the chicken on paper towels as it is finished cooking.
6. Prepare the rice as directed and add a dash or two of turmeric to the water to give the rice a beautiful  color.
7. Place the left over marinade with the tomato, basil, parsley, garlic, rosemary and hot pepper, plus the  sliced  red onion in a  frying  pan with a drizzle of olive oil and sauté until the onion is soft.
8. Add the rice and toss.  Serve  with the chicken strips.
Credit: Foodista

Tater Tot Soup

0
Photo Credit:- Cosori Air Fryers
Here’s the fastest cheese-and-potato soup we can imagine! The Tater Tots break apart– even break down– under pressure, leaving you with little potato shreds, as if you’d grated a potato into the soup. Those potato bits also thicken the soup, particularly as it sits a few minutes after cooking to melt all that (absolutely necessary) cheese. The frozen hash brown cubes then give you more little bits of potato throughout the soup for a better overall texture. Dried herbs work better than fresh here. They have an earthier flavor that matches the Tater Tots and cheese. And one other thing: Heat the liquid up before you add the Tater Tots. Otherwise, they fall to the bottom of the pot in the (colder) liquid. You’ll end up with a burn notice, no question.

INGREDIENTS

  • 6  cups  chicken or vegetable broth  1 1/2 quarts
  • 2  tbsp  butter
  • 2  tsp  peeled and minced garlic
  • 2  tsp  dried basil  oregano, or thyme
  • 1  tsp  onion powder
  • 1/2  tsp  ground black pepper
  • 1  lb  frozen unseasoned hash brown cubes  (3 cups,  NOT frozen shredded hash browns
  • 5  cups  frozen Tater Tots  or potato puffs;  1 1/4 lbs
  • 2  cups  shredded mild  or sharp Cheddar cheese;  8 ounces

INSTRUCTIONS

  1. Press the button SAUTÉ. Set it for HIGH, MORE, or CUSTOM  400 °F  and set the time for  10 minutes.
  2. Mix the broth, butter, garlic, dried herb, onion powder, and pepper in an Instant Pot. Heat, stirring occasionally, until wisps of steam rise from the liquid. Stir in the hash brown cubes and Tater Tots. Lock the lid onto the pot.
  3. Option 1  Max Pressure Cooker
    Press Pressure cook on Max pressure for  3 minutes  with the Keep Warm setting off.
  4. Option 2  All Pressure Cookers
    Press SOUP/BROIL or Pressure Cook (Manual) on High pressure for  4 minutes  with the Keep Warm setting off. The valve must be closed.
  5. Use the  quick- ­release method  to bring the pot’s pressure back to normal. Unlatch the lid and open the cooker. Stir in the cheese. Set the lid askew over the pot for a couple of minutes until the cheese melts. Stir again, then serve hot.

RECIPE NOTES

Beyond
– For an 8-quart Instant Pot, you must increase the broth to  2 quarts  (8 cups).
– For a richer soup, stir up to  1 cup  heavy or light cream into the soup before you add the cheese in step 5.
– For a sweeter soup, use half regular tots and half sweet potato tots (sometimes called “puffs”).
– Garnish the servings with crumbled bacon, sour cream, and/or minced chives (or the green part of a scallion). Or crisp Tater Tots in a skillet,
toaster oven, or an air fryer and use them as a garnish on the soup

Source:- Cosorithis

Ziti with Sausage and Peppers

0
Photo Credit:- Cosori Air Fryers
The best sausage for this sort of easy pasta casserole are the fat links that come five or six to a package. (Or, of course, honest-to-God Italian sausages from an Italian butcher. But who would freeze those instead of grilling them right up and snarfing them down?) If you haven’t thought in advance to slice the sausages into 1-inch bits before freezing them, don’t worry. Sausages are so full of fat that they slice easily, even when frozen.

INGREDIENTS

  • 1  lb  frozen hot or mild Italian sausage  (pork or turkey; gluten- ­free if that is a concern), cut into  1‑inch  pieces
  • 3  cups  plain marinara or spaghetti sauce  24‑ounce  jar
  • 2  cups  chicken broth
  • 1  tbsp  dried Italian seasoning blend
  • 1  lb  frozen bell pepper strips  4 cups, any color
  • 12  ounce  dried ziti  or gluten- ­free dried ziti
  • 6  ounce  shredded mozzarella cheese  (1 1/2 cups)

INSTRUCTIONS

  1. Press the button SAUTÉ. Set it for HIGH, MORE, or CUSTOM  400 °F  and set the time for  10 minutes.
  2. Mix the sausage, marinara, broth, and seasoning blend in an Instant Pot. Cook, stirring occasionally, until many wisps of steam rise from the liquid. Turn off the SAUTÉ function; stir in the bell pepper strips and ziti. Lock the lid onto the pot.
  3. Option 1  Max Pressure Cooker
    Press Pressure cook on Max pressure for  5 minutes  with the Keep Warm setting off.
  4. Option 2  All Pressure Cookers
    Press Meat/Stew or Pressure cook (Manual) on High pressure for  6 minutes  with the Keep Warm setting off. The valve must be closed.
  5. Use the  quick- ­release method  to bring the pot’s pressure back to normal. Unlatch the lid and open the cooker. Stir in the shredded cheese. Set the lid askew over the pot and set aside for 5 minutes to melt the cheese and let the pasta continue to absorb excess liquid. Serve by the big spoonful.

RECIPE NOTES

Beyond
– Use any frozen vegetables you like. But since pepper strips are classic, don’t ditch them entirely, even if you want to add other frozen vegetables.
Consider  8 ounces  frozen bell pepper strips plus  8 ounces  of another vegetable, even frozen chopped onion.
– Skip the purchased Italian seasoning and make your own blend: Combine  1 teaspoon  dried oregano,  1/2 teaspoon  dried rosemary,  1/2 teaspoon  dried thyme,  1/2 teaspoon  grated nutmeg, and  1/2 teaspoon  fennel seeds.
– Garnish the servings with stemmed and minced fresh herbs, particularly parsley and oregano.
– And/or drizzle a little balsamic vinegar over each serving.

Source:- Cosorithis

Chicken Spatchcocked

0

Love roasted chicken and it is always welcomed with open arms in our family. This time I wanted to do something a bit different and seeing that I never made spatchcocked, the time to do it finally came.

Rubbing salt under the skin of the chicken, added tons of flavor to the meat. The butter intensified that flavors. I wanted to not let the chicken sits on the juices and the rendered fat, therefore using the wire rack which truly kept the chicken moist and added the bold lemon — garlic — onion flavor, yet not overpowering it at all.   The chicken cooking was quicker and more even this way. The skin, my favorite part, nice and crisp.

Ingredients

5 pounds whole chicken
3 lemons, sliced
Fresh thyme springs
1 2-inch piece ginger, peeled and sliced
1 Vidalia onion, peeled and sliced
6 garlic cloves, peeled, hard end removed
3 tablespoons unsalted butter, cut into 4 pieces
2 cups chicken stock
1 cup white wine
salt
pepper

Preparation

1. Preheat the oven to 375F.
2. Place the chicken breast side down on a cutting board. Using a chef’s knife or poultry sheers, cut along each side of backbone, separating backbone from the chicken. Remove backbone and save it for stock or discard.
3. Turn the chicken, breast side up facing you, on a cutting board. With the heel of your hands, press firmly against the breastbone until it cracks, and it becomes flat.
4. Start at the neck and loosen and lift skin around the breasts and around the tights part of the chicken. Gently pushing between skin and meat (be careful not to detach skin completely) rub salt under the skin. Place the cut butter under the skin. Sprinkle generously salt and pepper all over the cavity and the all over skin.
5. In a large cookie sheet spread the lemon, thyme, sliced onion, garlic and ginger to cover the bottom. Sprinkle with salt. Place the wire rack over the lemon onion mixture and place the flatten chicken, breast side up, in the middle of the rack. Add the wine and the 1 ½ cup of the chicken stock.
6. Roast the chicken in the preheat oven. Add more chicken stock to the cookie sheet if it starts to dry out. Rotate the chicken halfway through roasting time. Poke gently with a fork the breast at the tight junction to let out any juices. Bake for 1 to 1 ½ hours. Remove from oven and let rest for 10 minutes before carving.
Credit: Foodista

Vortex Plus – Crispy Honey BBQ Wings

0
Photo Credit:- Cosori Air Fryers
On-the-bone wings cooked to crisp perfection without oils or starches, then coated in a homemade honey BBQ sauce. (Ace Blender recipe included, with a stovetop alternative).

INGREDIENTS

  • Ingredients
  • 2  lbs  chicken wingettes and drumettes
  • 1/2  cup  ketchup
  • 3  tbsp  White vinegar
  • 2  tbsp  molasses
  • 2  tbsp  honey
  • 1/2  tsp  liquid smoke
  • 1/4  tsp  paprika
  • 1/4  tsp  garlic powder
  • cayenne  a  Pinch  of; for taste

INSTRUCTIONS

  1. Divide the wings onto two cooking trays, leaving space between each piece.
  2. Place the drip pan in the bottom of the cooking chamber. Using the display panel, select  AIRFRY, then adjust the temperature to  380 °F  and the time to  25 minutes, then touch  START.
  3. When the display indicates “Add Food” insert one cooking tray in the top-most position and one tray in the bottom-most position.
  4. When the display indicates  “Turn Food”  turn the food over  AND  switch the cooking trays so that the one that was in the top-most position is now in the bottom-most position, and vice-versa.
  5. Meanwhile, in an  Ace Plus Blender, combine remaining ingredients and cook on  Soup 1 for 10 minutes  (or alternatively, simmer in a saucepan, stirring occasionally for 10 minutes).
  6. When the  AirFry  program is complete, toss with the sauce and serve hot.
Source:- Cosorithis