Post a Free Blog

Submit A Press Release

At CWEB, we are always looking to expand our network of strategic investors and partners. If you're interested in exploring investment opportunities or discussing potential partnerships and serious inquiries. Contact: jacque@cweb.com

Generic selectors
Exact matches only
Search in title
Search in content
Post Type Selectors
Filter by Categories
Action
Animation
Anime
ATP Tour (ATP)
Auto Racing
Baseball
Basketball
Boxing
Breaking News
Business
Business
Business Newsletter
Call of Duty (CALLOFDUTY)
Canadian Football League (CFL)
Car
Celebrity
Champions Tour (CHAMP)
Comedy
CONCACAF
Counter Strike Global Offensive (CSGO)
Crime
Dark Comedy
Defense of the Ancients (DOTA)
Documentary and Foreign
Drama
eSports
European Tour (EPGA)
Fashion
FIFA
FIFA Women’s World Cup (WWC)
FIFA World Cup (FIFA)
Fighting
Football
Formula 1 (F1)
Fortnite
Golf
Health
Hockey
Horror
IndyCar Series (INDY)
International Friendly (FRIENDLY)
Kids & Family
League of Legends (LOL)
LPGA
Madden
Major League Baseball (MLB)
Mixed Martial Arts (MMA)
MLS
Movie and Music
Movie Trailers
Music
Mystery
NASCAR Cup Series (NAS)
National Basketball Association (NBA)
National Football League (NFL)
National Hockey League (NHL)
National Women's Soccer (NWSL)
NBA Development League (NBAGL)
NBA2K
NCAA Baseball (NCAABBL)
NCAA Basketball (NCAAB)
NCAA Football (NCAAF)
NCAA Hockey (NCAAH)
Olympic Mens (OLYHKYM)
Other
Other Sports
Overwatch
PGA
Politics
Premier League (PREM)
Romance
Sci-Fi
Science
Soccer
Sports
Sports
Technology
Tennis
Thriller
Truck Series (TRUCK)
True Crime
Ultimate Fighting Championship (UFC)
US
Valorant
Western
Women’s National Basketball Association (WNBA)
Women’s NCAA Basketball (WNCAAB)
World
World Cup Qualifier (WORLDCUP)
WTA Tour (WTA)
Xfinity (XFT)
XFL
0
Home Blog Page 71

Balsamic Mushroom Risotto

0
Photo Credit:- Cosori Air Fryers

INGREDIENTS

  • 2 + 1  tbsp  olive oil  divided
  • 2 + 1  tbsp  butter  divided
  • 8  oz  crimini or baby bella mushrooms  sliced
  • 8  oz  wild mushrooms  (shitake, oyster, etc.), sliced
  • 1 1/2  tbsp  balsamic vinegar
  • 2  shallots  finely diced
  • 1 1/2  cups  Arborio rice
  • 1  tsp  celery seed
  • 1/2  cup  white wine
  • 3  cups  chicken broth  warmed, or vegetable
  • 2/3  cup  grated parmesan
  • Salt and pepper  to taste
  • 1/4  cup  chopped italian parsley  optional

INSTRUCTIONS

  1. Add  2 tbsp  olive oil and  2 tbsp  butter to the Instant Pot. Using the display panel select the  SAUTE  function and adjust to  MORE or HIGH.
  2. When oil gets hot and butter is melted, add sliced mushrooms. Cook, stirring occasionally, for 7 minutes, then drain off any excess liquid.
  3. Add soy sauce and cook and stir an additional 7 minutes.
  4. Add  1 tbsp olive oil  and  1 tbsp butter  to the pot and stir to melt. Add shallots, rice and celery seed to the pot and cook and stir 3 minutes.
  5. Add wine and deglaze by using a wooden spoon to scrape the brown bits from the bottom of the pot.
  6. Add warmed broth and stir. Turn the pot off by selecting  CANCEL, then secure the lid, making sure the vent is closed.
  7. Using the display panel select the  MANUAL or PRESSURE COOK  function*. Use the +/- keys and program the Instant Pot for 6 minutes.
  8. When the time is up, quick-release the remaining pressure.
  9. Stir risotto until desired consistency is reached (about 2-3 minutes) returning to  SAUTE  mode as needed.
  10. Stir in parmesan cheese until melted. Adjust seasonings as needed.
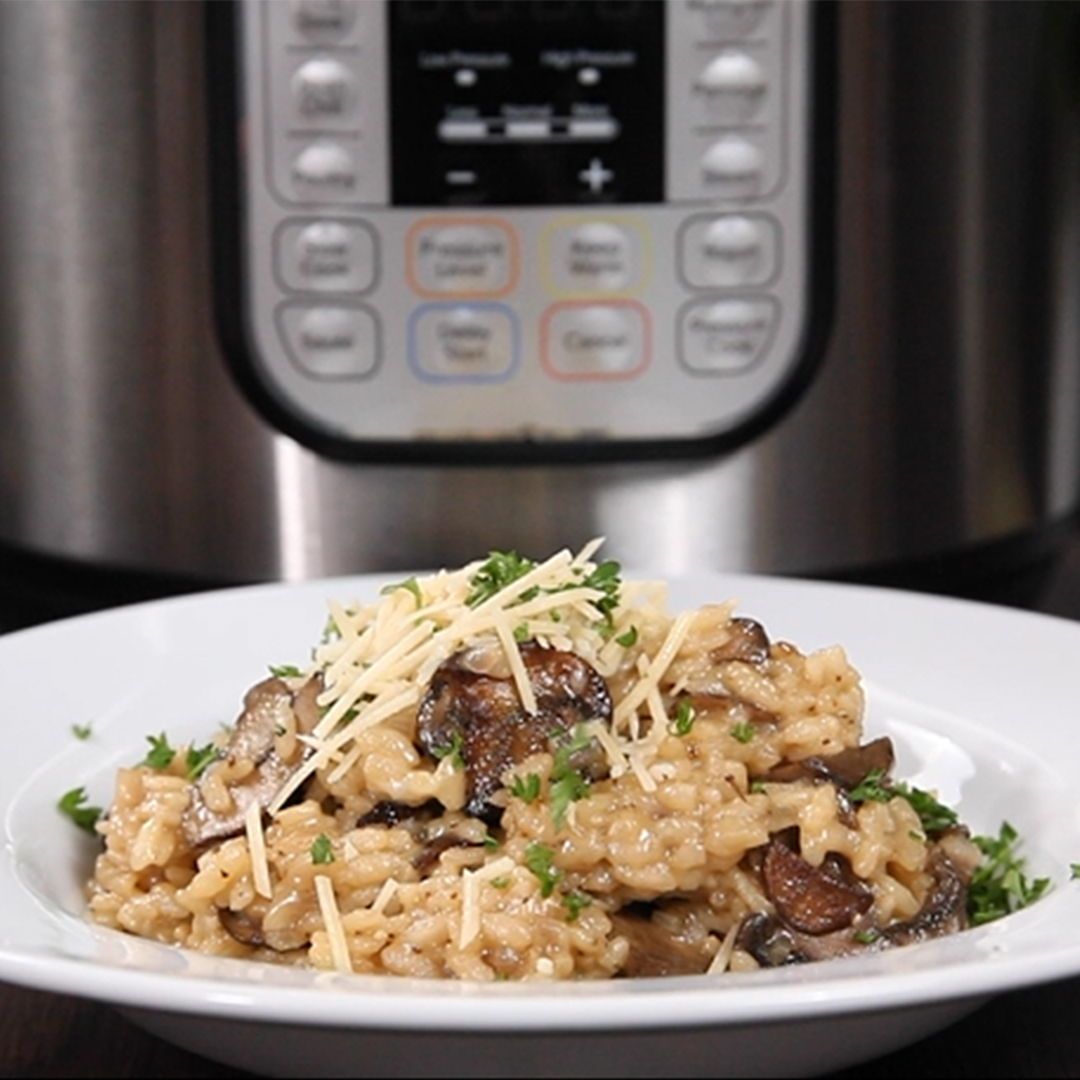
  11. Serve immediately garnished with chopped italian parsley.

RECIPE NOTES

*The MANUAL and PRESSURE COOK buttons are interchangeable.

Source:- Cosorithis

Better-Than-Takeout Chinese BBQ Spareribs

0
Photo Credit:- Cosori Air Fryers

INGREDIENTS

Sauce Mixture:
  • 3  tbsp  grated fresh ginger  or ginger paste
  • 8  garlic cloves  minced
  • 1  cup  honey
  • 3/4  cup  Hoisin Sauce
  • 3/4  cup  soy sauce
  • 1/2  cup  Water
  • 1/2  cup  rice wine  or dry sherry
  • 2  tsp  chinese 5-spice powder
  • 1  tsp  white pepper
  • 1  tsp  red food coloring  (optional but more authentic looking)
Better-Than-Takeout Chinese BBQ Spareribs:
  • 2  lbs  racks St. Louis-style spareribs  cut into individual ribs, 2 ½ – 3 each
  • 2  tbsp  toasted sesame oil

INSTRUCTIONS

  1. Add  Sauce Mixture  ingredients to the pot and whisk to combine. Add ribs and toss to coat.
  2. Secure the lid, making sure the vent is closed.
  3. Using the display panel select the  MANUAL or PRESSURE COOK  function*. Use the +/- keys and program the Instant Pot for 8 minutes.
  4. When the time is up, let the pressure naturally release for 15 minutes, then quick-release the remaining pressure.
  5. Carefully remove the ribs from the pot to a large bowl and cover loosely with foil, reserving juices.
  6. Strain cooking liquid to remove solids (press solids to extract as much flavor as possible). Discard solids.
  7. Use a fat separator or spoon to skim fat from the liquid mixture. Discard fat.
  8. Return braising liquid to the pot. Select the  SAUTE  function and adjust to  MORE or HIGH.  Cook, stirring occasionally, until reduced to a glaze, about  2 1/2 cups  (20-25 minutes).
  9. Heat oven to 425 degrees. Set a wire rack over a foil-lined, rimmed baking sheet. Pour  1/2 cup  water in baking sheet (helps to prevent smoking).
  10. Coat half the ribs in the glaze and arrange on the rack, bone-side up. Roast 5-7 minutes, then flip and roast an additional 5-7 minutes until well-caramelized. Transfer to serving dish and repeat with remaining ribs.
  11. Serve, passing remaining glaze as a dipping sauce.

RECIPE NOTES

*The MANUAL and PRESSURE COOK buttons are interchangeable.

Source:- Cosorithis

Cod Monterey

0

Crispy Pan Fried Cod on top of green chile black beans and rice. Top that cod with chopped tomatoes, red onion and a cilantro crema, and you have a beautiful, outstanding dish.

Ingredients

FOR THE FISH:
2 Cod Fillets (6 oz)
2 Cups Good Tortilla Chips
1 TSP Pepper
1 TSP Garlic Powder
1 TSP Cumin
1 TSP Onion Powder
1 TSP Ground Coriander
2 eggs, beaten
5 TBSP Olive Oil
FOR THE BEAN MIXTURE:
1 Can Black beans (15 oz), rinsed
1 Can Green Chiles (4.5 oz)
1 TSP Pepper
1 TSP Onion Powder
1 TSP Garlic Powder
2 TSP Chili Powder
½ Cup Long Grain Rice, Cooked
1 Lime, Juiced
FOR THE GARNISH:
2 Tomatoes, Chopped
¼ Red Onion, Finely Chopped
FOR THE CREMA:
¾ Cup Cilantro
½ Avocado
1 Lime, Juiced
1 TSP Pepper

Preparation

1. Add the chips and spices to the food processor. Grind until tortillas are a fine consisteny. Pour out onto a shallow dish. Pour egg into another shallow dish. Dip fish in egg and then in tortilla chip crust, pressing into sides. Add Olive oil to a large frying pan over medium high heat. Once hot, add fish and cook until golden brown about 3 minutes per side. Flip over and cook for another 3 minutes.
2. Meanwhile, add beans, rice, green chiles, spices and lime to a small saucepan. Heat over medium heat until warmed through, about 10 minutes.
3. Make the crema. Add avocado, lime, cilantro and pepper to a food processor. Puree until creamy.
4. Plate dish. Place ½ of rice and bean mixture on the bottom. Place fish on top. Sprinkle tomato and red onion on top of fish. Dollop crema on top of fish. ENJOY!
Credit: Foodista

Mustard Beer Braised Beef

0
 Photo Credit:- Cosori Air Fryers

INGREDIENTS

  • 2  lbs  well-marbled beef chuck or rump roast
  • 2  tsp  salt
  • 1/2  tsp  pepper
  • 2  tbsp  olive oil
  • 1  onion  finely diced
  • 1  carrot  diced
  • 1  celery stalk  diced
  • 1/2  tsp  kosher salt
  • 1  tbsp  mustard powder
  • 1 1/2  tsp  tomato paste
  • 1  garlic clove  minced
  • 1/2  cup  stout beer  like Guiness
  • 3  sprigs fresh thyme
  • 2  tbsp  whole-grain mustard

INSTRUCTIONS

  1. Season beef with salt and pepper.
  2. Add olive oil to the Instant Pot. Using the display panel select the  SAUTE  function and adjust to  MORE or HIGH.
  3. When oil gets hot, add onion, carrot and celery to the pot and saute until tender, 3-4 minutes.
  4. Add mustard powder, tomato paste and garlic and cook for 1-2 minutes more.
  5. Add stout beer and thyme to the pot and deglaze by using a wooden spoon to scrape the brown bits from the bottom of the pot.
  6. Nestle the beef into the vegetable mixture.
  7. Turn the pot off by selecting  CANCEL, then secure the lid, making sure the vent is closed.
  8. Using the display panel select the  MANUAL or PRESSURE COOK  function*. Use the +/- keys and program the Instant Pot for 40 minutes.
  9. When the time is up, let the pressure naturally release for 10 minutes, then quick-release the remaining pressure.
  10. Carefully remove the meat from the pot to a cutting board and cover loosely with foil.
  11. Discard thyme sprigs. Use a fat separator or spoon to skim fat from vegetable mixture.
  12. Use an immersion blender (or regular blender) to process vegetable mixture until smooth, then stir in whole grain mustard. Adjust seasonings.
  13. Serve sliced beef roast topped with mustard sauce.

RECIPE NOTES

*The MANUAL and PRESSURE COOK buttons are interchangeable.

Source:- Cosorithis

Creamy Mushroom Chicken

0
Photo Credit:- Cosori Air Fryers
Happily for you, I’m not about to suggest using a can of cream of mushroom soup in this (or any other) recipe. But, happily for you, if you like cream of mushroom soup, you won’t miss it after you try this recipe. It’s the taste of comfort for many of us, just healthier than anything that might come out of a can. It’s also an easy recipe. I ask you to put the spinach in with the rest of the ingredients to add more flavor to the dish. The spinach will cook down and blend in with everything else, and you’ll have a vegetable and chicken dish done in one shot.

INGREDIENTS

  • 2  tbsp  salted butter
  • 6  cloves  garlic  thickly sliced
  • 1  cup  sliced yellow onions
  • 2  cups  quartered button mushrooms
  • 1  lb  boneless  skinless chicken thighs
  • 3 – 4  sprigs  fresh thyme  or  1 tsp  dried
  • 2  tbsp  Water
  • 1  tsp  salt
  • 1  tsp  black pepper
  • 4  cups  baby spinach
  • 1/2  cup  heavy cream
  • 1  tbsp  lemon juice  fresh

INSTRUCTIONS

  1. Select  SAUTÉ  on the Instant Pot. When the pot is hot, add the butter. When the butter has melted, add the garlic. Cook, stirring continuously, until garlic is fragrant and slightly softened, about 1 minute (take care not to let it burn).
  2. Add the onions and mushrooms and stir to coat. Add the chicken, thyme, water, salt, and pepper. Stir to combine. Place the spinach on top of the chicken mixture. Select  CANCEL.
  3. Secure the lid on the pot. Close the pressure-release valve. Select  MANUAL or PRESSURE COOK  and set the pot at  HIGH  pressure for 8 minutes. At the end of the cooking time, allow the pot to sit undisturbed for 10 minutes, then release any remaining pressure.
  4. Transfer the chicken to a serving platter. Cover lightly with aluminum foil to keep warm.
  5. Select  SAUTÉ  on the Instant Pot. While stirring continuously, slowly add the cream in a steady stream. Cook, stirring, until the mixture starts to thicken, 5 to 8 minutes. Stir in the lemon juice. Select  CANCEL.
  6. Serve the chicken with the mushroom-spinach mixture.

Source:- Cosorithis

Cod Linguine

0

This cod linguine packs all the flavour of the ancient dish that inspired it, and can be prepared in 30 minutes or less. Capers and anchovies shine alongside honey and balsamic, and plenty of herbs add depth to this recipe. Cod provides essential B vitamins, is an excellent source of protein, and contains potassium and healthy omega-3 fatty acids. This meal quickly comes together for a delicious, healthy weeknight dinner that’s more soFISHticated than your typical pasta dish.

Ingredients

400g/14oz cod fillets
1 tbsp. salt
1 tsp. black pepper
400g/14oz canned tomatoes
150g/5.25oz white onion, diced
30g/1oz garlic, finely chopped
70g/2.5oz capers, finely chopped
30g/1oz anchovies, finely chopped
1/2 tsp. dried chilli flakes
20ml/0.75fl oz balsamic vinegar
15ml/0.5oz honey
1/2 tsp. Dried Basil
1/2 tsp. dried oregano
250g/8.75oz uncooked gluten-free linguine

OrganicGreek.com — Vitamin Bottles

Preparation

1. Cook linguini according to package instructions.
2. Season cod fillets with salt and pepper on both sides.
3. Heat olive oil in a deep skillet.
4. Pan-fry cod for 3-4 minutes per side. Set aside.
5. In the same pan, sautee onions until translucent.
6. Add garlic and chilli flakes. Sautee for another minute.
7. Add canned tomatoes, capers, anchovies, balsamic vinegar, honey, basil, oregano and a quarter cup of water. Simmer for 15 minutes.
8. Serve over linguini.
Credit: Foodista

Karahi Chicken

0
Photo Credit:- Cosori Air Fryers
I have to thank one of my readers, Saira, for helping me with this recipe, which is fast and, with that lovely tomato ginger sauce, absolutely delicious. She mentioned it once in my Facebook group as something her mother used to make that she really missed eating. I started to play with the recipe. After one or two tries where I missed the mark, she pronounced this recipe a success. This is a staple dish in Pakistan. Karahi means “wok,” but you certainly do not need to make it in a wok. ACTIVE TIME: 10 minutes FUNCTION: Sauté; Pressure/Manual (High) TOTAL TIME: 25 minutes Dietary Considerations: Grain-Free, Gluten-Free, Egg-Free, Nut-Free, Soy-Free, Dairy-Free, Low-Carb

INGREDIENTS

  • 2  tbsp  vegetable oil
  • 1/2  cup  minced or grated fresh ginger
  • 1 1/2  pounds  boneless  skinless chicken thighs, cut into 4 pieces each
  • 14.5  oz  diced tomatoes  1 can  undrained
  • 1  tsp  ground cumin
  • 2  tsp  garam masala
  • 1  tsp  salt
  • 1/2 – 1  tsp  cayenne pepper
  • 1/4  cup  chopped fresh cilantro or parsley
  • 2 – 3  tbsp  fresh lemon juice
  • fresh ginger  cut into julienne, for serving

INSTRUCTIONS

  1. Select  SAUTÉ  on the Instant Pot. When the pot is hot, add the oil. When the oil is hot, add the minced ginger. Cook, stirring, until it starts to brown, 2 to 3 minutes. Select  CANCEL. Add the chicken, tomatoes with their juices, cumin,  1 teaspoon  of the garam masala, the salt, and the cayenne. Stir to combine.
  2. Secure the lid on the pot. Close the pressure-release valve. Select  MANUAL or PRESSURE COOK  and set the pot at  HIGH  pressure for 5 minutes. At the end of the cooking time, allow the pot to sit undisturbed for 10 minutes, then release any remaining pressure.
  3. Stir in the cilantro, lemon juice, remaining  1 teaspoon  garam masala, and the julienned ginger and serve.

RECIPE NOTES

NOTES
– That really is 1/2 cup fresh ginger–that is not a typo. Do not use ground ginger in this dish. You want to cut the ginger quite small. I made coins, then I made julienne, then I minced them. You want to do this so you don’t get a huge chunk of ginger in any one bite. #trusturvashi
– You can use 2 cups chopped fresh tomatoes, but if you do that, add 1/4 cup water, just in case your tomatoes aren’t juicy enough.
– Omit the cilantro if you hate it. You can substitute parsley if you’d like.

Source:- Cosorithis

Kimchi Beef Stew (Kimchi Jjigae)

0
Photo Credit:- Cosori Air Fryers
I have to thank my friend David for a lot of things in my life–but especially for teaching me how to eat a variety of Korean foods, and how to eat a lot of it from a shared plate while pretending he ate most of it. He introduced me to this spicy, fragrant kimchi stew on a cold, wet, rainy day in New York. I crave this when it rains. It’s also a great use for kimchi that may have been aging gracefully in your fridge for a while.

INGREDIENTS

  • 1  pound  beef  cut into  2 inch  cubes, preferably a fatty cut
  • 2  cups  prepared kimchi
  • 2  cups  Water
  • 1  cup  chopped yellow onions
  • 1  cup  dried shiitake mushrooms  or other dried mushrooms
  • 1  tbsp  minced Garlic
  • 1  tbsp  minced fresh ginger
  • 1  tbsp  toasted sesame oil
  • 1  tbsp  dark soy sauce
  • 1  tbsp  gochugaru  Korean ground red pepper or  1/2 tsp  cayenne pepper,
  • 1  tbsp  gochujang  Korean red chile paste
  • 1/2  tsp  sugar
  • salt
  • 1/2  cup  Sliced scallions  for serving
  • 1  cup  diced firm tofu  for serving (optional)

INSTRUCTIONS

  1. In the Instant Pot, combine the beef, kimchi, water, onions, mushrooms, garlic, ginger, sesame oil, soy sauce, gochugaru, gochujang, and sugar.
  2. Secure the lid on the pot. Close the pressure-release valve. Select  MANUAL or PRESSURE COOK  and set the pot at  HIGH  pressure for 15 minutes. At the end of the cooking time, allow the pot to sit undisturbed until the pressure has released.
  3. Taste and season with salt. Stir in the scallions and the tofu, if desired, and serve.

RECIPE NOTES

– First things first. There is NO substitute for gochujang. None. Don’t even try. Don’t even ask me, I won’t respond to your question. Buy it and use it in my other recipes that call for it.
– Gochugaru looks flaming red, but it’s actually a lot less spicy than cayenne pepper. You can put in a tad bit of cayenne pepper instead, but be mindful of the spice in the kimchi.
– You can use regular soy sauce instead of dark soy sauce. The dark version just has a richer, sweeter taste.
– For a  vegetarian  version, omit the beef and cook the kimchi (use a vegetarian version), water, onions, mushrooms, garlic, ginger, sesame oil, soy sauce, gochugaru, gochujang, and sugar for 5 minutes. Let the pressure release naturally for 10 minutes, then add the diced tofu.

Source:- Cosorithis

Cod fillets in a milky sauce

0

Cod with a little onion and a little milk: one of the most classic north Italian fish recipes.

Ingredients

500g cod fillets, either fresh or frozen
¼ cup corn flour
½ tsp salt
½ tsp pepper
½ a small onion, minced
2 tbs olive oil
1 tbs butter
2 cups milk
1 tsp cornstarch
Pinch of salt
Fres parsley, chopped

Preparation

1. If the fillets are frozen, thaw them.
2. Mix corn flour, salt and white pepper.
3. Dredge the fillets through the flour mixture, set aside.
4. Sauté the onion in the oil and butter until it begins to brown.
5. Add the cod fillets, brown them for 3 minutes on each side.
6. Add ½ cup milk to partially cover them, and simmer for 5 minutes. When done, remove them to a platter.
7. Add cornstarch, and stir in the remaining milk. Season with salt. Let the sauce bubble for 2-3 minutes until slightly thicker.
8. Pour the sauce over the fish, garnish with lots of chopped parsley, and serve with pilav and green salad.
Credit: Foodista

Lamb and Rice Casserole (Lamb Dum Biryani) with Cosori Air Fryers

0
Photo Credit:- Cosori Air Fryers
You know how you make a traditional Indian lamb biryani? First you get ready to dirty about six different pots in your kitchen. Next you obsess over the exact doneness of the rice. What is “50 percent done” or “75 percent done” rice, as traditional recipes ask you to gauge? Then you worry about the lamb not cooking as fast as the rice. Finally, six hours later, when your kitchen looks like a hurricane hit it, you pick up the phone and order pizza. Or you can make this stupid-simple recipe for an authentic biryani instead. Yes, the lamb will cook in the short time, as long as you marinate it and cut it into bite-size pieces. You can substitute beef for the lamb as well, if you like.

INGREDIENTS

For The Rice and Lamb:
  • 1  cup  Basmati rice  (see Note)
  • 1/2  cup  plain greek yogurt
  • 1/2  cup  minced yellow onion
  • 1/2  cup  chopped fresh cilantro
  • 1/4  cup  chopped fresh mint
  • 1  serrano chile  seeded, if desired, and minced
  • 1  tbsp  minced fresh ginger
  • 1  tbsp  minced Garlic
  • 2  tsp  garam masala
  • 1  tsp  salt
  • 1  tsp  ground turmeric
  • 1/4 – 1  tsp  cayenne pepper
  • 1/4  tsp  ground cardamom
  • 1/4  tsp  ground cinnamon
  • 1/8  tsp  ground cloves
  • 1  lb  lamb shoulder or leg  trimmed and cut into bite-size cubes
  • 1  cup  Water
For The Garnish:
  • 1  yellow onion  thinly sliced
  • 1  tsp  vegetable oil
  • 1/4  tsp  salt
  • 1/2  cup  fresh cilantro

INSTRUCTIONS

  1. For the rice and lamb:  Place the rice in a colander and rinse under cool running water; set aside to soften and absorb some of the water.
  2. In a large bowl, combine the yogurt, minced onion, cilantro, mint, chile, ginger, garlic, garam masala, salt, turmeric, cayenne, cardamom, cinnamon, and cloves. Whisk to combine. Add the lamb and toss to coat. Allow the mixture to stand at room temperature for 30 minutes while the rice rests.
  3. Meanwhile, prepare the garnish:  Preheat the broiler to high. Line a rimmed baking sheet with foil.
  4. Break the onion slices apart with your fingers and arrange them on the prepared baking sheet. Drizzle with the oil and season with the salt. Toss to combine. Broil the onions for about 15 minutes, stirring only once or twice.
  5. In the Instant Pot, arrange the lamb mixture so it covers the bottom of the pot. Carefully spread the rice all over the meat in a uniform layer. Carefully pour the water over the rice, gently pushing down on the rice until it’s submerged in the water. (Do not mix the lamb and rice together.)
  6. Secure the lid on the pot. Close the pressure-release valve. Select  MANUAL or PRESSURE COOK  and set the pot at  HIGH  pressure for 6 minutes. At the end of the cooking time, allow the pot to sit undisturbed until the pressure has released. (This part is important, as it approximates the traditional steam cooking process.)
  7. Serve topped with the browned onion garnish and the cilantro.

RECIPE NOTES

NOTE: Use aged Indian basmati, not American basmati, if possible.

Source:- Cosorithis