Post a Free Blog

Submit A Press Release

At CWEB, we are always looking to expand our network of strategic investors and partners. If you're interested in exploring investment opportunities or discussing potential partnerships and serious inquiries. Contact: jacque@cweb.com

Generic selectors
Exact matches only
Search in title
Search in content
Post Type Selectors
Filter by Categories
Action
Animation
Anime
ATP Tour (ATP)
Auto Racing
Baseball
Basketball
Boxing
Breaking News
Business
Business
Business Newsletter
Call of Duty (CALLOFDUTY)
Canadian Football League (CFL)
Car
Celebrity
Champions Tour (CHAMP)
Comedy
CONCACAF
Counter Strike Global Offensive (CSGO)
Crime
Dark Comedy
Defense of the Ancients (DOTA)
Documentary and Foreign
Drama
eSports
European Tour (EPGA)
Fashion
FIFA
FIFA Women’s World Cup (WWC)
FIFA World Cup (FIFA)
Fighting
Football
Formula 1 (F1)
Fortnite
Golf
Health
Hockey
Horror
IndyCar Series (INDY)
International Friendly (FRIENDLY)
Kids & Family
League of Legends (LOL)
LPGA
Madden
Major League Baseball (MLB)
Mixed Martial Arts (MMA)
MLS
Movie and Music
Movie Trailers
Music
Mystery
NASCAR Cup Series (NAS)
National Basketball Association (NBA)
National Football League (NFL)
National Hockey League (NHL)
National Women's Soccer (NWSL)
NBA Development League (NBAGL)
NBA2K
NCAA Baseball (NCAABBL)
NCAA Basketball (NCAAB)
NCAA Football (NCAAF)
NCAA Hockey (NCAAH)
Olympic Mens (OLYHKYM)
Other
Other Sports
Overwatch
PGA
Politics
Premier League (PREM)
Romance
Sci-Fi
Science
Soccer
Sports
Sports
Technology
Tennis
Thriller
Truck Series (TRUCK)
True Crime
Ultimate Fighting Championship (UFC)
US
Valorant
Western
Women’s National Basketball Association (WNBA)
Women’s NCAA Basketball (WNCAAB)
World
World Cup Qualifier (WORLDCUP)
WTA Tour (WTA)
Xfinity (XFT)
XFL
0
Home Blog Page 65

Country Breakfast: Tofu and Veggie Scramble With Home Fries

0

I am glad to feature my recipe because I know that breakfast is one of the most important meals that fuels and determines how I will be feeling the rest of the day. Yes, food affects moods, at least the wrong food choices. Tofu is so versatile as I learned through Isa Chandra’s book with brunch and breakfast ideas. It is exciting to know that there are so many options, so I decided to make my own version of a tofu scramble with veggies with a side of home fries. Sometimes I alternate this meal with 2 pieces of Ezekiel toast. Both of these breakfast options equal to a close 400 calories for the whole meal.

Ingredients

Tofu  and  Veggie Scramble
serves 2
12 ounces  box Mori-Nu  tofu
1 tablespoon  olive oil
1 cup  sliced  mushrooms
1 cup  asparagus,  chopped
1/2 cup  onions,  chopped
1  garlic clove,  minced
1 1/2 teaspoons  Italian seasonings
1 1/2 teaspoons tumeric
1/2 teaspoon  garlic powder
1/2 teaspoon  cayenne pepper
1/2 teaspoon  crushed  black pepper
2 tablespoons  water
Home Fries
serves 2
3 inches  red potatoes,  diced ½ thick
2 teaspoons  crushed  black pepper
1 1/2 teaspoons  salt
2 tablespoons  olive oil

Preparation

1. Tofu and veggie  scramble
2. Press  the tofu for 30 minutes prior to cooking.  Chop  all the veggies and leave ready to begin cooking process.
3. Using a non-stick  skillet,  heat  olive oil on medium  heat.  Add  pressed tofu  and crumble in large pieces. The tofu will need to cook and  dry  out a little for 10 to 15 minutes, so meanwhile, add onions and garlic to tofu.
4. After those 15 minutes, add asparagus and mushroom and all the rest of the spices plus the water. Cook for 5 minutes and  serve  hot!
5. Home Fries
6. Prepare potatoes before starting on tofu  scramble.
7. Preheat oven  to 450F and move oven rack to the next to last highest row. Line a small cookie sheet with parchment paper.
8. Wash  and scrub potatoes. Dice them and add to a medium bowl. Add olive oil,  salt  and pepper and  mix  well. Pour potatoes on cookie sheet and spread evenly.  Bake  for 20 minutes and  serve  while hot.
Credit: Foodista

Sriracha Sloppy Joes

0
Photo Credit:- Cosori Air Fryers

INGREDIENTS

  • 2  tbsp  neutral vegetable oil or ghee
  • 1  lb  lean ground beef  (90% lean)
  • 1  medium yellow onion  diced
  • 2  large carrots  diced
  • 1  large green bell pepper  seeded and diced
  • 2  garlic cloves  chopped
  • 1  cup  tomato sauce
  • 2  tbsp  sriracha
  • 2  tbsp  low-sodium soy sauce
  • 2  tbsp  rice vinegar
  • 1/4  cup  firmly packed brown sugar
  • 4  hamburger buns  split and toasted
  • Thinly sliced red onion  for serving
  • Sliced sandwich pickles  for serving

INSTRUCTIONS

  1. Select the Sauté setting on the Instant Pot and heat the vegetable oil. Add the ground beef and sauté until the meat is cooked through and no traces of pink remain, about 8 minutes, breaking up the meat with a spoon as it cooks. Add the onion, carrots, bell pepper, and garlic and sauté for about 5 minutes more, until the vegetables are softened. Stir in the tomato sauce, Sriracha, soy sauce, vinegar, and brown sugar.
  2. Secure the lid and set the Pressure Release to Sealing. Press the Cancel button to reset the cooking program, then select the Pressure Cook or Manual setting and set the cooking time for 20 minutes at high pressure. (The pot will take about 10 minutes to come up to pressure before the cooking program begins.)
  3. When the cooking program ends, you can either perform a quick pressure release by moving the Pressure Release to Venting, or let the pressure release naturally and leave the pot on the Keep Warm setting for up to 10 hours.
  4. Stir the Sloppy Joe mixture, then ladle onto the hamburger buns and top with sliced red onion and pickles. Serve hot.

RECIPE NOTES

Notes: The Sloppy Joe mixture may look a little soupy when you open the pot, but in a minute or two after stirring, it sets up and thickens. Feel free to mix in a little tomato paste or a squeeze of ketchup if you like yours even thicker. Alternatively, cook the mixture on the Sauté setting for a few minutes, or until thickened to your liking.

For a Paleo diet, substitute equal amounts of coconut vinegar, coconut aminos, and coconut sugar for the rice vinegar, soy sauce, and brown sugar. Serve with cauliflower “rice”, in lettuce cups, or on top of roasted slices of sweet potato.

Source:- Cosorithis

Homemade Hamburger Helper with Air Fryer

0
Photo Credit:- Cosori Air Fryers

INGREDIENTS

For pot:
  • 1  lb  ground beef  preferably 93% lean
  • 1  tbsp  onion powder
  • 1  tbsp  garlic powder
  • 2  cups  beef broth
  • 16  oz  elbow macaroni
For sauce:
  • 1  cup  half and half
  • 10  ounce  Cheddar cheese  shredded
  • 3  ounce  American cheese  cut into strips (from the deli, not the kind that comes in cellophane!)
  • 2  cups  fresh spinach  finely chopped (optional)
  • 2  tsp  kosher salt  or to taste
  • 1/2  tsp  pepper  or to taste
  • Additional shredded cheese for garnish  if desired

INSTRUCTIONS

  1. Using the display panel select the  SAUTE  function.
  2. Add ground beef, onion powder and garlic powder to the Instant Pot. Cook and stir until no pink remains.
  3. Press  Cancel  Pour in pasta and broth, then secure the lid, making sure the vent is closed.
  4. Using the display panel select the  MANUAL or PRESSURE COOK  function*. Use the +/- keys and program the Instant Pot for 4 minutes.
  5. When the time is up, quick-release the remaining pressure.
  6. Stir in half and half, then stir in the cheese, a little at a time, until melted. Season with kosher salt and pepper.
  7. Just before serving, fold in chopped spinach, if using. Top with additional cheese for garnish, if desired.

RECIPE NOTES

*The MANUAL and PRESSURE COOK buttons are interchangeable.

Source:- Cosorithis

Coulibiac Of Salmon

0

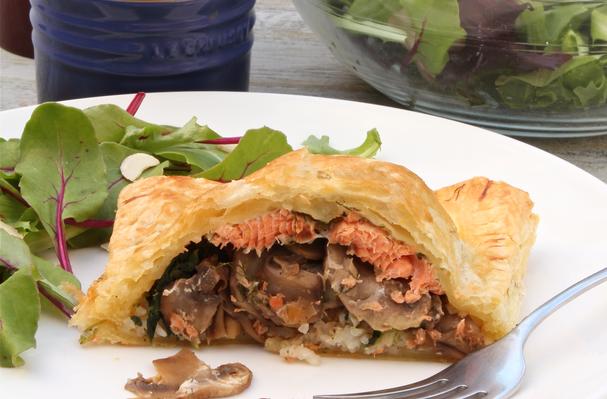
This dish is a true show-stopper with a gorgeous golden crust and layers of yummy goodness inside! It’s perfect for dinner parties or hosting the boss, and fairly easy to put together. Enjoy!

Ingredients

2 sheets  of thawed  puff pastry
2 tablespoons  unsalted butter
3  shallots,  thinly sliced
1 pound  mushrooms,  sliced
1/2 cup  white wine
1/4 cup  chopped  dill
1 cup  cooked (leftover)  rice
8 ounces pieces of  salmon,  cut in half for 4 square-ish pieces
1 box  chopped  frozen  spinach,  thawed
1  egg
Salt  and  pepper

Preparation

1. Preheat  the oven to 400 degrees F.
2. Place a  skillet  over medium  heat.  Add the butter,  sliced  shallots and mushrooms. Saute for 5 minutes to  brown  the mushrooms. Then  salt  and pepper to  taste  and add the wine. Allow the mushrooms to  simmer  until the wine has completely reduced and the mushrooms are nearly dry–about 15-20 minutes.
3. Meanwhile,  cut  one sheet of puff pastry into 4 squares and place them on a parchment paper-lined  baking  sheet.  Top  each square with 1/4 cup of cooked rice–make sure to leave a border around the edges.
4. Squeeze  the spinach to remove any excess liquid, then layer the spinach over the rice. Sprinkle the spinach with a touch of  salt.
5. Once the mushrooms have cooked down, layer them on  top  of the spinach.
6. Now  top  each stack with a half-portion of salmon.  Salt  and pepper the Salmon and sprinkle with fresh dill.
7. Whisk  the egg and brush it around the exposed puff pastry edges.
8. Roll  the second piece of puff pastry out to a slightly larger square.  Cut  it into four smaller squares. Lay each square over a salmon stack. Gently  seal  the edges by crimping with a fork.
9. Brush the remaining egg over the  tops.  Cut  a small vent in the  top  of each pastry.
10. Bake  for 20-30 minutes until the tops are golden!
Credit: Foodista

5-Ingredient Pork Shoulder

0
Photo Credit:- Cosori Air Fryers

INGREDIENTS

  • 2  tablespoons  butter
  • 3  lbs  boneless pork shoulder  trimmed; cut in  3 pieces
  • 1  cup  Progressoâ„¢ chicken broth  from  32-ounces  carton
  • 2  tablespoons  packed brown sugar
  • 2  tablespoons  soy sauce
  • 10  cloves  garlic  finely chopped
  • 1  teaspoon  salt

INSTRUCTIONS

On Instant Potâ„¢, select SAUTE; adjust to normal. Melt butter in insert. Add pork; sear 2 to 4 minutes on all sides or until browned. Select CANCEL.
  1. In small bowl, mix broth, brown sugar, soy sauce, garlic and salt. Pour over pork in insert. Secure lid; set pressure valve to SEALING. Select MANUAL; cook on high pressure 90 minutes. Select CANCEL. Keep pressure valve in SEALING position to release pressure naturally.
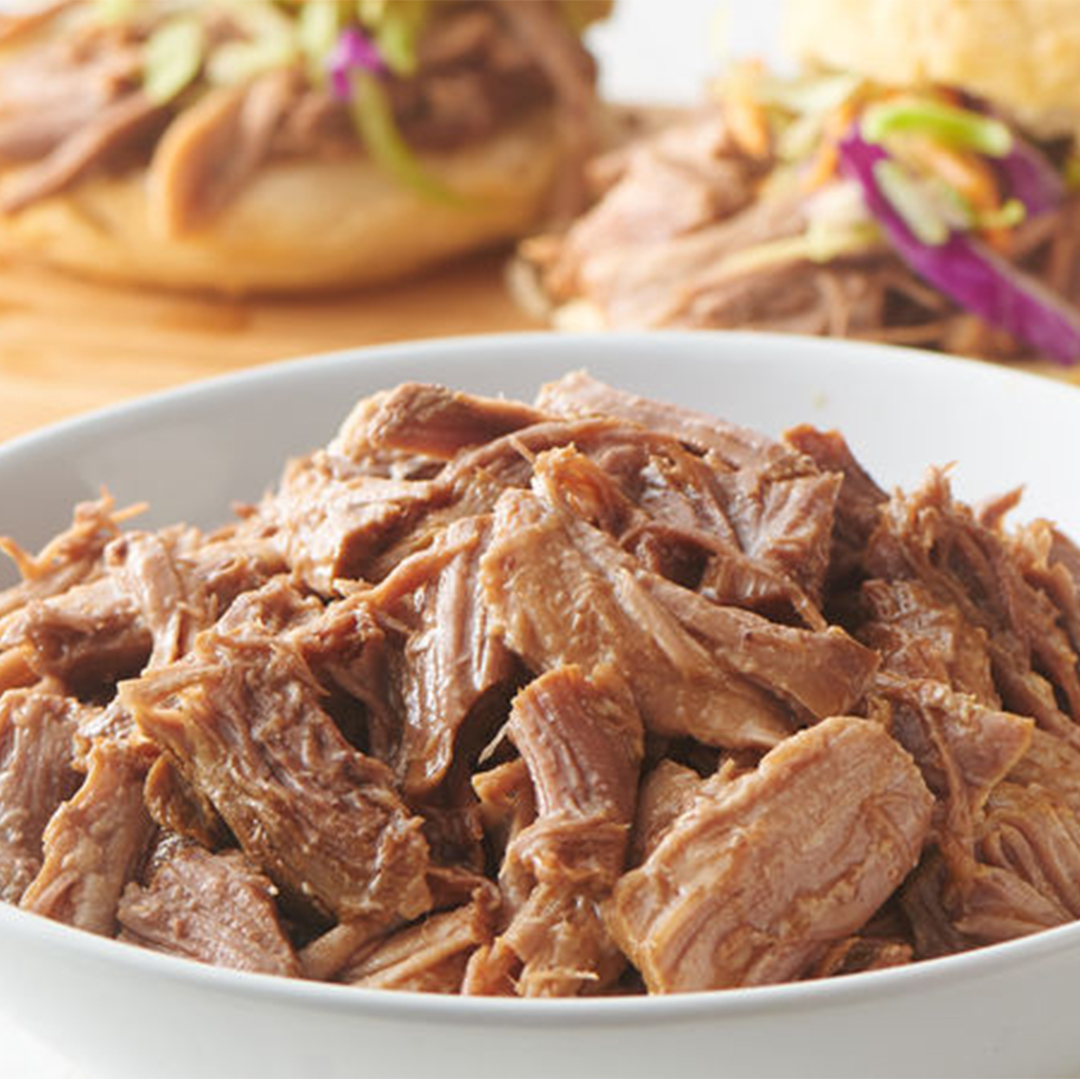
  2. When cool enough to handle, shred pork, and toss with 1 cup of the cooking liquid; discard remaining cooking liquid.

RECIPE NOTES

This pulled pork works well stuffed into tacos or pitas, served over rice or mashed potatoes, or piled on buns.

Cutting the pork in several large pieces allows the meat to cook quickly and evenly in the pressure cooker.

When releasing pressure naturally, it’s always a good idea to set the pressure valve to VENTING after the float valve drops down, just to be sure all of the pressure has been released.

Source:- Cosorithis

Beef and Black Bean Chili

0
Photo Credit:- Cosori Air Fryers

INGREDIENTS

  • 1  tablespoon  vegetable oil
  • 1  lb  extra-lean ground beef  at least 90%
  • 2  cups  chopped yellow onions
  • 1  tablespoon  chili powder
  • 1/2  teaspoon  salt
  • 1  can  Muir Glenâ„¢ organic fire-roasted crushed tomatoes  undrained,  28 ounces
  • 1  can  Progressoâ„¢ black beans  drained, rinsed,  15 ounces
  • 1  can  can Old El Pasoâ„¢ chopped green chiles  4.5 ounces
  • 1/2  cup  Water

INSTRUCTIONS

  1. On Instant Potâ„¢, select SAUTE; adjust to normal. Heat oil in insert. Add beef, onions, chili powder and salt; cook 8 to 10 minutes, stirring occasionally, until thoroughly cooked. Select CANCEL.
  2. Stir in tomatoes, beans, chiles and water. Secure lid; set pressure valve to SEALING. Select MANUAL; cook on high pressure 5 minutes. Select CANCEL. Keep pressure valve in SEALING position to release pressure naturally.

RECIPE NOTES

Trademarks referred to herein are the properties of their respective owners.

Top with shredded Colby-Jack cheese, sour cream, chopped fresh cilantro or green onions.
We used extra-lean ground beef in this recipe, so there’s no need to drain the beef after cooking.
When releasing pressure naturally, it’s always a good idea to set the pressure valve to VENTING after the float valve drops down, just to be sure all of the pressure has been released.

Source:- Cosorithis

Cornmeal Crusted Chicken with Kale Pesto

0

The health benefits of dark leafy greens, like kale are undeniable! It supposedly is one of the healthiest vegetables on the planet! “One cup of chopped kale contains 33 calories and 9% of the daily value of calcium, 206% of vitamin A, 134% of vitamin C, and a whopping 684% of vitamin K. It is also a good source of minerals copper, potassium, iron, manganese, and phosphorus.” (webmd.com).

Heres the thing, i’m not a huge fan because it can me a bit on the tough side. I keep the kale raw* in this recipe. Just like a traditional pesto theres the cheese, garlic, nuts and olive oil. The flavors worked wonderfully with the cornmeal crusted chicken breasts. The lightly seasoned cornmeal has a slightly nutty taste to it and makes for a nice crisp coating!

I served mine with some roasted carrots and homemade chips.

Ingredients

1 1/2 lbs boneless skinless chicken breasts
1 cup cornmeal
1 tsp salt
1 tsp garlic powder
1/2 tsp black pepper
1 egg, lightly beaten
for the pesto:
1 bunch of kale, thick end of stems removed
1/4 cup grated pecorino romano
4 cloves garlic
1/3 cup unsalted almonds
approx 1/4 cup olive oil

Preparation

1. Place the chicken breasts between two pieces of plastic wrap and pound thin.
2. Coat the chicken first in the egg then into the cornmeal seasoned with the garlic powder, salt and pepper. Heat a saute pan over medium/ medium high heat, add enough olive oil to coat the bottom and cook the chicken on each side until golden and the chicken is cooked through.
3. For the pesto add the kale, cheese, garlic and almonds into a food processor. Pulse a few times to begin to break the ingredients down. With the machine on, drizzle in enough olive oil to just make it come together. Taste, season with salt and pepper.
4. This is a decent sized batch so place into a mason jar and top with a little extra olive oil to keep the extra in the fridge.
5. Top each chicken breast with a nice dollop of the kale pesto.
6.* it is not recommended to eat raw kale more then once of twice a week if you have a thyroid condition and not recommended for people of blood thinners because of the high vitamin k content*
Credit: Foodista

Creamy Garlic Pork Chops

0
Photo Credit:- Cosori Air Fryers

INGREDIENTS

  • 1  cup  Progressoâ„¢ chicken broth  from  32-ounce  carton
  • 4  cloves  garlic  finely chopped
  • 1/2  teaspoon  salt
  • 1/2  teaspoon  pepper
  • 4  bone-in pork loin chops  1 3/4 lb
  • 2  tablespoons  cornstarch
  • 2  tablespoons  Water
  • 4  oz  cream cheese  cubed and softened, from  8-ounce package

INSTRUCTIONS

  1. Spray Instant Potâ„¢ insert with cooking spray. Add broth to insert. Stir in garlic, salt and pepper.
  2. Add pork chops to broth mixture in insert. Secure lid; set pressure valve to SEALING. Select MANUAL; cook on high pressure 2 minutes. Select CANCEL. Set pressure valve to VENTING to quick-release pressure. Internal temperature of pork should be at least  145 °F  using instant-read thermometer. If pork is not done, select MANUAL and cook on high pressure 1 to 2 minutes longer. Select CANCEL. Set pressure valve to VENTING to quick-release pressure.
  3. Remove pork chops from pot, and place on plate; cover with foil to keep warm.
  4. In small bowl, beat cornstarch and water with whisk. Select SAUTE, and adjust to normal; heat liquid to simmering. Beat in cornstarch mixture; cook 30 to 60 seconds, beating frequently with whisk, until thickened. Select CANCEL. Beat in cream cheese with whisk until smooth. Serve over pork chops.

Source:- Cosorithis

Whole “Roast” Chicken and Gravy

0
Photo Credit:- Cosori Air Fryers

INGREDIENTS

  • 2  tablespoons  butter
  • 3 – 4  lb  whole chicken  giblets removed
  • 2  teaspoons  seasoned salt
  • 1  cup  Progressoâ„¢ unsalted chicken broth  from  32-ounce  carton
  • 3  tablespoons  cornstarch
  • 3  tablespoons  Water
  • OrganicGreek.com — VitaminBottles

INSTRUCTIONS

  1. On Instant Potâ„¢, select SAUTE; adjust to normal. Melt butter in insert. Rub chicken all over with seasoned salt, and place in insert, breast side down; sear 4 to 6 minutes or until browned. Turn and sear on back side 2 to 4 minutes longer; using tongs, transfer to plate. Select CANCEL.
  2. Carefully place rack in insert. Add broth. Place chicken breast side up on rack. Secure lid; set pressure valve to SEALING. Select MANUAL; cook on high pressure 20 minutes. Select CANCEL. Keep pressure valve in SEALING position to release pressure naturally. Internal temperature in thigh should be at least 165 °F using instant-read thermometer. If chicken is not done, select MANUAL and cook on high pressure 2 to 5 minutes longer. Select CANCEL. Keep pressure valve in SEALING position to release pressure naturally.
  3. When cool enough to handle, carefully transfer chicken to cutting board, and remove rack.
  4. Select SAUTE, and adjust to normal; heat liquid to simmering. In small bowl, beat cornstarch and water with whisk; stir into liquid and cook 1 to 2 minutes, stirring constantly, until thickened.
  5. Carve chicken; serve with gravy.
Source:- Cosorithis

Cornish Game Hen with Whisky and Cream Pan Sauce

0

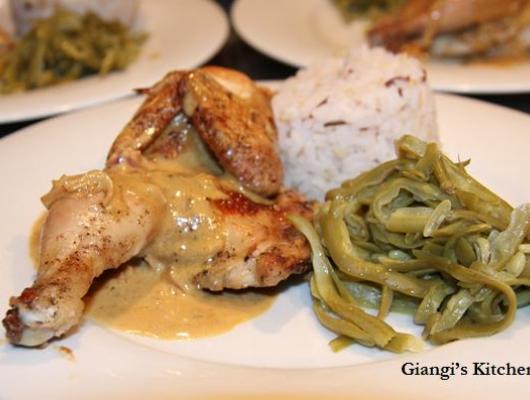
Cornish game hen is the perfect last-minute get together dinner meal. Easy to prepare and half of an hen is perfect balance between both white and dark meat. I always have two in my freezer.

The whisky sauce is an adaptation from a recipe in Fine Cooking magazine. Very easy yet delicious. The whisky evaporated as it cooks, leaving a wonderful bold flavor into the cream and butter. Cognac can be used instead of the whisky.

Rice was the perfect pairing. I added some wild rice just because I wanted something different.

We enjoyed a nice glass of Nebbiolo red wine alongside.

Bon Appetit!

Giangi

Ingredients

2 large Cornish game hens, 1 ½ to 2 pounds each
2 tablespoons butter
Olive oil
Salt and pepper
Herbs de Province
2 tablespoons unsalted butter
2 medium shallots, finely sliced
¼ to ½ cup of whisky (I used Jack Daniel’s)
1 teaspoon Worcestershire sauce
1 tablespoon Dijon mustard
½ cup heavy cream
2 teaspoons fresh lemon juice

Preparation

1. For the Cornish hen:
2. Preheat the oven at 450 º and position the rack in the middle of the oven.
3. Place a hen, breast side down on a cutting board. Remove the backbone by cutting along both sides with shears or large sharp knife. Flip the hen and flatten it by pressing down on the breastbone with your palm. Split the hen in two along the breastbone. Repeat with the remaining hen.
4. Place on a heavy baking dish and spread on each half, ¼ of a teaspoon of butter, Herbs de Province, salt and pepper and a drop of olive oil. Place in the hot oven and cook for 30 to 45 minutes. Poke the hen while cooking to release any juices.
5. When done, remove from the oven, place the hen in a dish and cover with aluminum foil and let rest.
6. To make the sauce:
7. Place the unwashed cooking pan over the stove and add the remaining 2 tablespoon of butter and let it melt. Lower the heat and add the whisky, very slowly. With a wooden spoon scrape up any bit on the pan. Add the shallots and cook until tender, 1 minutes. Add the Worcestershire sauce, mustard and raise the heat to medium high. Bring to a boil stirring constantly. Add the heavy cream and the lemon juice. Taste the sauce and season with salt and pepper.
8. Serve hot over the Cornish hen.
Credit: Foodista